- Home
- Compare Systems
- Cheap Systems
- Free Quotes
- DIY Systems
- Hardwired Systems
- Wireless Systems
- Smoke Detectors
- Medical Alarms
- Alarm Monitoring
- Cameras & Video
- Ademco
- ADT Security
- Brinks Security
- Broadview
- DSC Security
- FBI Alarms
- GE Security
- Honeywell
- Link Interactive
- Monitronics
- Moose
- Napco
- Protection 1
- Radionics
- Simplisafe
- Alarm Manuals
- Alarm System Parts
- Alarm Tools
- Troubleshooting
- FAQ
- Glossary
- Sitemap
- About Me
- Contact Me
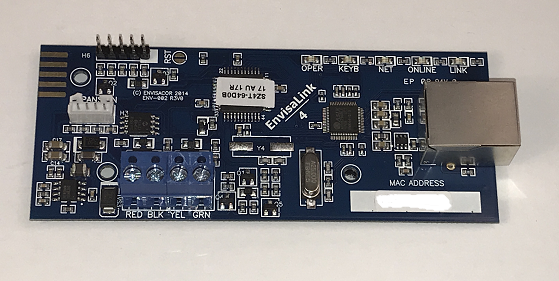
EyezOn EVL-4EZR Operation
This is the second page of a 2-page article, and describes how to operate the EyezOn EVL-4 through the web interface. It also shows you how to set up alerts and customize the operation of the EVL-4 to match your specific needs.
If you have not yet set up an Envisalink account, installed the module in your panel, and gotten it to connect to your smartphone or desktop, see the first page, "Envisalink 4 Installation & Account Setup"
Accessing the EyezOn EVL-4 on your Local Network Using the Web Interface
To access your EVL-4 on your local network using your PC, visit www.eyezon.com and log into your account. This will take you to the “Recent Activity” screen of your device.
To make accessing your device easier, you may want to create a desktop shortcut. Just follow the easy steps below:
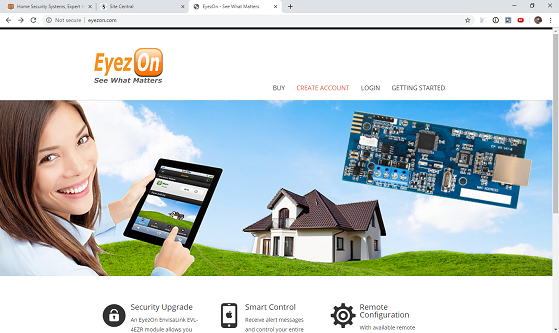
For PC:
- Go to www.eyezon.com and log into your account.
- Select the entire web address in the address bar
- Copy the address (“Control+C”)
- Next, right-click on any open area on your desktop. Select “New” from the drop-down menu.
- Select “Shortcut”, and paste the eyezon web address in the “location” field (Control+V)
- Click “Next”, and type in a name for the EVL. I used “EVL 4 Local Access”.
- Click on “Finish”.
For Mac OS:
- Go to www.eyezon.com and log into your account.
- (Left) Click & drag the address onto the desktop and release the mouse button.
That’s it! You can now double-click this shortcut anytime to go directly to your device.
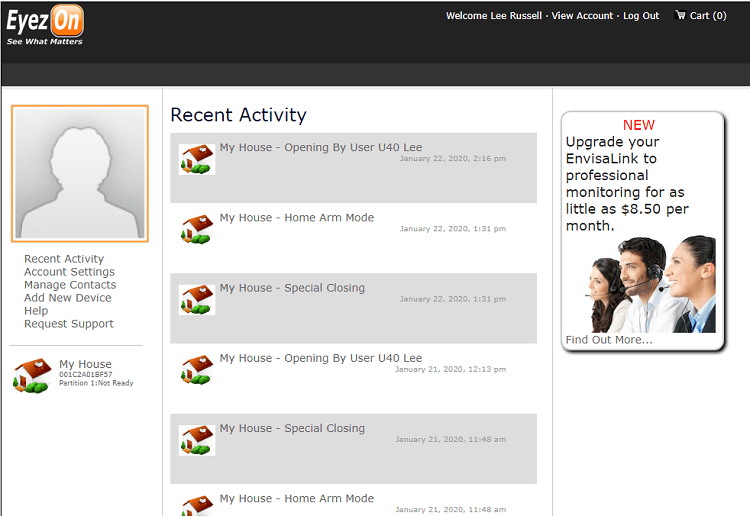
Viewing Status
The “Recent Activity” screen lists the latest events by time and date. Clicking on your device icon (or any event) will pull up a ‘details” screen showing your EVL device info, as well as a numbered zone grid showing individual zone status. Each zone number is color-coded, based on its recent condition:
Open zones are displayed as black numerals on a bright red background.
Closed zones are shown as white digits. Their background color varies from dull-red for recently closed zones, to black for zones closed many hours ago.
To the right of the grid is a list of the most recent events, along with the time since they occurred.
Setting Up the Basics
Setting up your Envisalink device is done through the web interface. These functions are only available for editing when you log into your account via the web page; they can’t be changed through the EyezOn app.
Keep in mind that with the basic Envisalert plan, you’re limited in which features you can use, and in what you can customize. Below are the options you will most likely want to change.
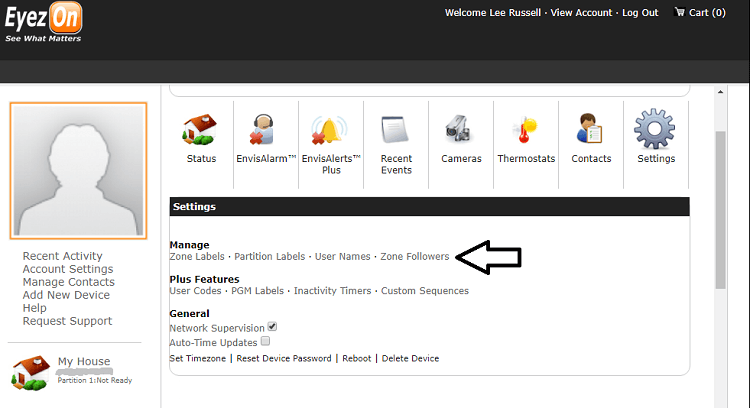
All of the following options can be added or changed by clicking on the icon for your device (Called “My House” in this example), then clicking on the “Settings” gear icon. The options are listed under the “Manage” section.
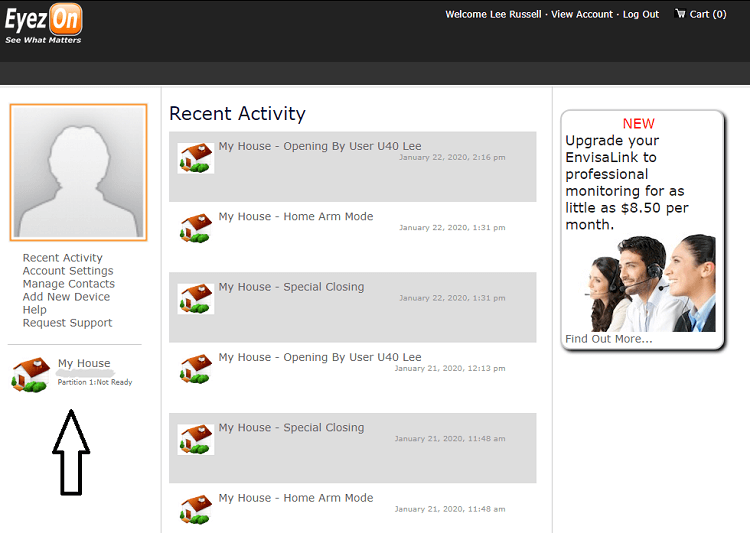
Zone Labels
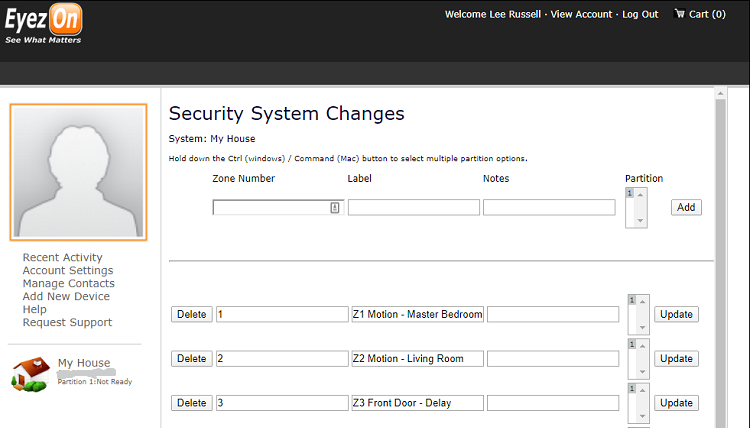
Unless you only use the 8 on-board zones for your alarm system, you likely can’t remember exactly what doors, windows, etc. are on each zone. To make things easier, you can add custom text to more clearly describe each of your alarm zones.
If you’re going to use the app to receive alerts on your smartphone, here’s a tip: Include the zone number in your text label. For example, instead of labelling a zone “Office Window”, label it “Z6 Office Window”.
The reason?
The “Zone Activity” screen in the EyezOn app doesn’t show the zone number, just the zone label you have entered. When you tap on the main “Zone Activity” screen to pull up the detailed events screen, it can be confusing to keep track of which zone number goes with each description.
By including the zone number in the text label, it’s much easier.
If you already have a zone list, you can just copy the zone information into the zone label entry fields. If you don’t have a zone list and aren’t sure what is on each zone, you can get help figuring it out in the section “Finding the Open Zones” on my DSC 832 page.
A Note on the DSC Fire Zone
The DSC Power panels have a dedicated fire zone designed for the use of 2-wire smoke detectors. Unlike the Ademco Vista panels, the DSC fire zone isn’t a numbered zone, and does not show up in the EVL 4 status screen or other display screens.
I was curious to see how the EVL 4 handled fire alarms, so I did some testing.
When I triggered the smoke detector zone on my Power 832, I received a push notification of “2-wire smoke detector” almost immediately on my iPhone.
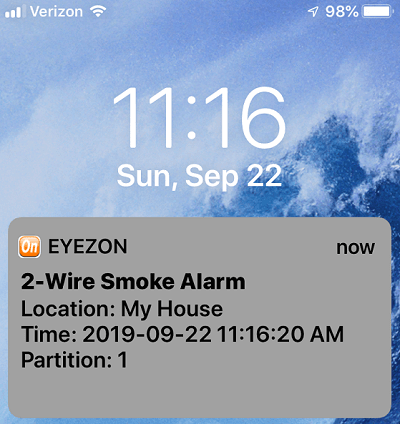
In addition, by using the “Commands” button in the EyezOn app, I was able to issue a *72 command, which successfully reset the smoke detector.
So, While I would really prefer to see an icon, symbol, or other figure in the zone list showing the fire zone status, I feel confident that the DSC panel is communicating with the EVL 4 module, and that I will get any programmed alerts as intended.
Partition Labels
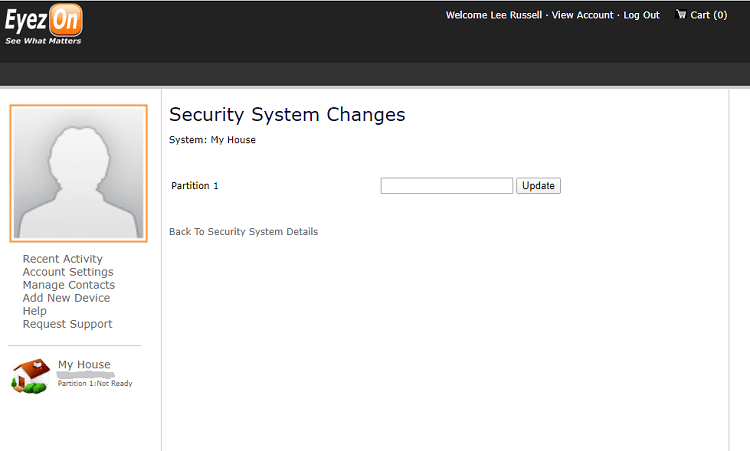
I didn’t have any need to change the default text of “Partition 1”, since I’m only using one partition. If you have other partitions (a detached garage or workshop, a guest house, safe room, or other special area,) give it an appropriate name to help you remember which area is which.
User Names
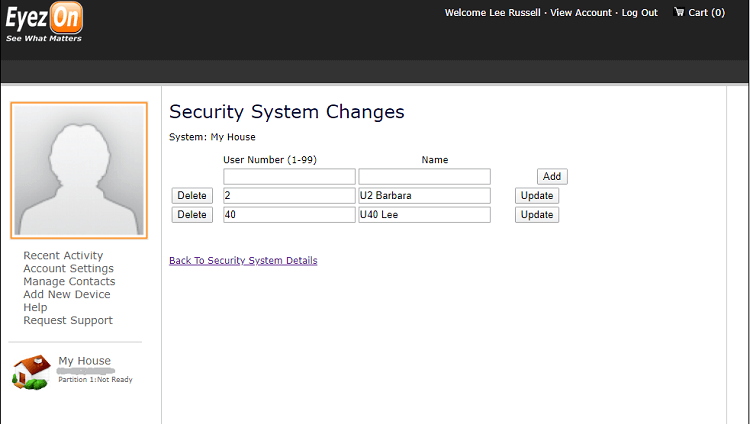
This page allows you to list all of the users of your alarm system by user number, and add their names with custom text. This is very handy if you have more than a few people using the alarm, since you will almost certainly lose track of which code you’ve assigned to each person.
Entering the information here will cause the arming and disarming alerts to include the person’s name. Again, as with Zone Labels, it might be helpful to include the user number in the name description, for the sake of clarity. Instead of naming a user simply “Mom” or “Larry”, name them “3 Mom” and “7 Larry”.
Zone Followers
If you have a particular zone that you want to keep special track of, you can assign a follower to it. A followed zone will give you a notification whenever it has activity, regardless of the armed state of the system. This could be used for a safe or gun cabinet, a sensitive computer area, a storage room, etc.
The free EyezOn plan allows you to follow activity on any single zone. If you need to follow more than one, you’ll need to upgrade to a paid plan.
One caution here - The EyezOn User Guide includes the following warning regarding Zone Followers:
“Warning, excessive use of Zone Follower alerts is against the Acceptable Use Policy. This feature will be throttled or even disabled if more than a few alerts are generated per day
So, consider which zone(s) you want to follow carefully, to avoid any problems.
Setting Up Alerts
In order to receive alerts, you’ll need to configure “contacts”. In EVL-speak, contacts are not individual people; they are various methods of contacting a given user. When setting up alerts with the EVL, think of a “contact” as a “channel” or “path” to reach a given user.
There are three types of contacts:
- Push Alerts
- SMS Messages
- Email Messages
Push Alerts are automatically created the first time you log in to your device on the mobile app. You will begin to receive these from your system without doing anything at all.
SMS and Email messages are created through the “Manage Contacts” option in the left-side menu. You’ll need to enter a phone number (for SMS alerts) or a valid email address (for email alerts.)
To set up each type of alert, you need to create a contact specific to that alert. Once created, you can customize which alerts you want to receive via each contact method. Here’s how to do it:
Create a New Contact
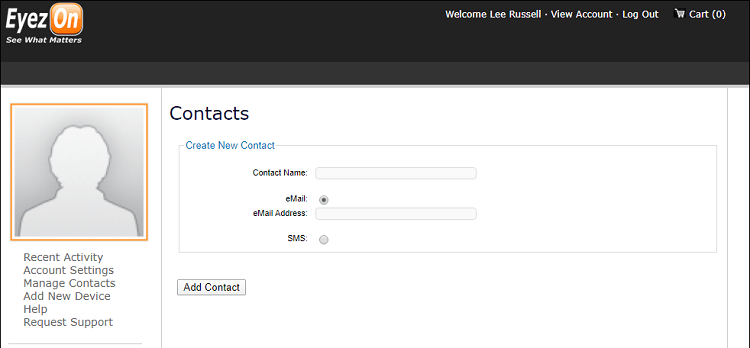
- Click on “Manage Contacts” in the left-hand menu, then select “Create New Contact”
- Enter the first and last name, then select “Email” or “SMS”.
- Enter the email address (for an email alert) or the cell phone number (for SMS alerts.) For SMS, select the cellphone carrier from the drop-down menu.
- Click on “Add Contact”
Verify New Contact
You’ll need to verify each contact method before it can receive alerts.
For Email Alerts:
To verify an email contact, use the email link you receive within a few minutes after clicking on “Add Contact”. After clicking on the link, you’ll see a message indicating your contact has been verified.
- If you are unable to verify using the link, you can instead use the 6-digit PIN number included in the email.
- Log in to your EyezOn account and select “Manage Contacts”.
- Find the contact name with the “(Not Verified)” tag next to it.
- Click on “Enter PIN” Enter the 6-digit PIN included in the verification email, and click “Submit”.
For SMS Alerts:
- To verify an SMS contact, log in to your EyezOn account and select “Manage Contacts”.
- Find the contact name with the “(Not Verified)” tag next to it.
- Click on “Enter PIN” Enter the 6-digit PIN included in the verification email, and click “Submit”.
Assign the Device You Want to Get Alerts From
Now that you’ve created your contact(s), you need to assign your Envisalink device to the contact(s).
- Click on “Manage Contacts”
- Select the contact from the list provided, then click “Assign Device”
- Find the device and click the button for “Enable”.
- In the screen that appears, check the boxes next to the alerts you want to receive. You can choose to receive notifications for alarms, armings and disarmings, and several other conditions.
When you’re finished choosing your alerts, click the button for “Back to Devices” to exit this screen, or just log off.
Setting the Time Zone
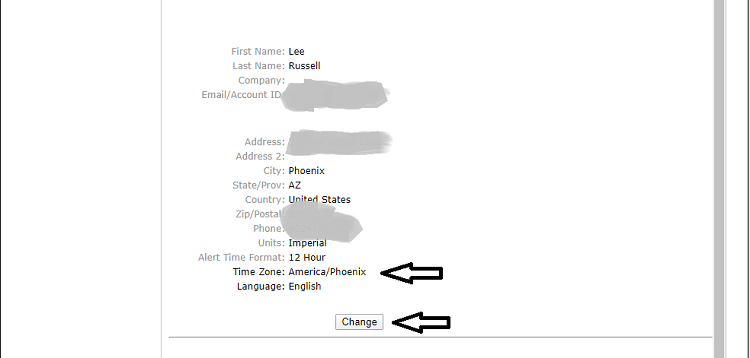
Since you will most likely want the alerts you receive to be time stamped accurately, you’ll need to set the EVL to your local time zone. Follow these steps:
- Log in to your EyezOn account.
- Click on the “Account Settings” link.
- Scroll down just below the “Time Zone”listing, and click on the “Change” button.
- Click on the current time zone entry to open a drop-down menu. Scroll up or down to find your time zone, then click on it.
- When the correct time zone is displayed, click on “Save Changes”.
Advanced Setup Details
The steps outlined above should enable you to set up any of the contacts and alerts you need. For details on changing alerts, setting up additional users, and other advanced features, see the EyezOn User Guide which can be accessed through the “Help” tab in the left-side menu of the web interface.
Using the Envisalink for Self-Monitoring
You may have first learned about the Envisalert module because it enables Ademco Vista and DSC Power-series owners to self-monitor their systems. This can be a good way to avoid paying monthly monitoring fees.
And, the EVL 4 does do that very well... However, the equipment providing the alerts works very well, it’s only half of the equation. The other half?
YOU!
Here are some things to keep in mind before you commit to a self-monitoring strategy.
Caveats for those wanting to use EVL-4 for self-monitoring:
- You will be the “responding authority”, or at least be responsible for calling them;
- You are not available 24/7/365;
- If you get an alarm alert, and a break-in has actually occurred, how will you deal with the situation? Are you prepared to confront a burglar face to face?
For more details on this topic, please see my page here:
Should You Self Monitor Your Alarm System?
Envisalink Conclusions
If you’ve completed installation and set up alerts for your EyezOn EVL-4, you’re ready to start enjoying the peace of mind in knowing what’s going on at your home when you’re away.
The EVL-4 is the latest version of the EVL-line of modules, which have been widely installed and in use for several years. They are a reliable addition to compatible DSC and Ademco systems, and add free functionality that would otherwise only be possible through paid monitoring plans.
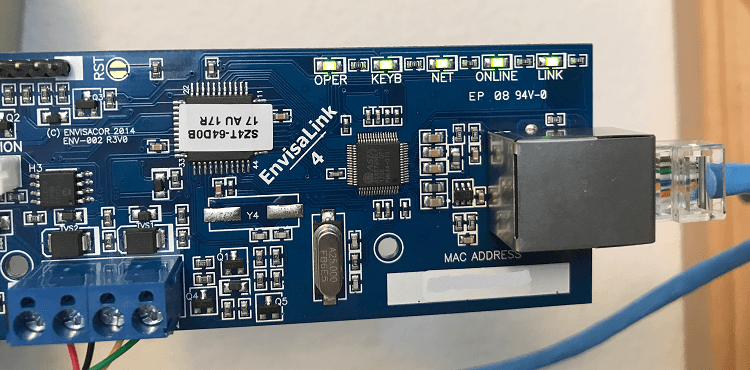
Maybe you’re reading this to help you decide whether or not you should invest the time and money to install an EVL module.
So, is the Envisalink 4 a good choice for you?
You can benefit the most if you fit any of the following:
- You are a current Vista or DSC Power owner, and you want to monitor your own security system without any monthly fees;
- You are a current Vista or Power owner who either already has alarm monitoring in place, or would like to sign up for the EyezOn Advanced Level Plan. This would allow you to get the benefits of a professionally monitored alarm system, and at the same time, get select alarm reports sent directly to your desktop or mobile device at no additional charge;
- You are a current owner of an older, failing hardwired-system and don’t want to scrap your existing prewired door & window contacts and motion sensors. You now have an option: Replace your existing hardwired system with a DSC Power or Ademco Vista panel, along with the EVL-4 module. You get to retain the use of your hardwired door, window, and other associated sensors, and gain the ability to self-monitor your security system.
- You have a compatible Ademco or DSC system and are planning to integrate it with a home automation system (See note below.) The EVL-4 is compatible with Alexa, and is being used with several other systems, based on what I’ve found.
I hope the information on these pages will help you decide if the EyezOn Envisalink 4 is a good choice for your situation.
Important Update:
A newer option is now available that lets you self-monitor and control almost any Ademco/Honeywell, DSC, First Alert, or ADT SafeWatch system!
Learn more about the Nexx Smart Alarm NXAL-100 Controller
A Note Regarding Ademco Systems and Home Automation:
If you are planning to tie your Ademco Vista system to any home automation devices, be aware that some functions may be limited.
Because of the way they are designed, Ademco Vista panels do not respond to zone status queries while in an “Armed” condition. This means that if you set up any home automation functions to be triggered by activity on an alarm panel zone, they will not work while the panel is armed.
Should You Sign Up for a Paid Plan?
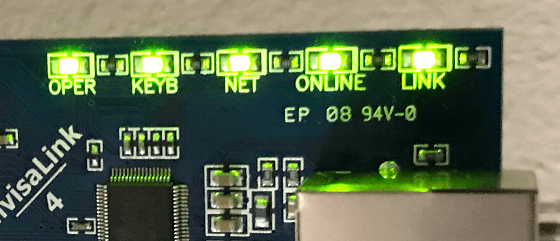
Whether you’re planning on using advanced/paid features or not, I recommend that you create an account and install the EVL first. Get it set up and working with the free Envisalert functions. Then, If you decide to upgrade to a paid plan, here’s how to do it:
- Log in to your EyezOn account
- Click on the icon for your device in the left-hand pane to see the “Details” page.
- Click on the icon for “Envisalarm” or “Envisalink Plus” feature.
- Click the “Subscribe” or “Sign Up Now” button to see current pricing and plan options.
I hope this 2-page article has helped you understand the EVL-4 and learn its features. If you've chosen to buy one, I hope I helped you more easily get it set up and installed, as well as customized to operate as you would like.
If you still need to set up an EyezOn account or install the EVL-4 module, see “Envisalink 4 Installation & Account Setup".
Info Accuracy Disclaimer Notice
I’ve made every effort to ensure the accuracy of the information in this article. EyezOn is constantly updating and improving their products, so pricing, plans, and features can change at any time. Always check with your supplier and the EyezOn website for current pricing and the latest product and plan details before ordering.
Even after all your efforts, you may decide that your system is beyond reasonable repair. If this happens, find out what a new system would cost by getting a few Free Home Security Systems Quotes from companies in your area.
These quotes can help you decide whether to pull the plug on the old system, install a new system yourself, or step aside and let a professional security company do the work.
RELATED PAGES:
Should I Self-Monitor my Alarm System?
DSC Security Systems (Escort Module Info)
Ademco Home Security Systems
Return to Home Page from EyezOn EVL-4EZR
Return to DIY Home Security Systems
EyezOn Resource Links
EnvisaLink 4 Quick-Start Manual
Envisalink4/Honeywell Vista Installation and Programming Guide
Note: Feel free to print any of the articles on this site for personal, non-commercial use. Just look for this button:
If you found this website especially helpful, you might want to consider making a small donation. Since 2011, AzAlarmGuy has been providing free help and advice on home security systems to all of those in need.
Your gift, in any amount, will help me keep this website a free resource for anyone needing help with alarm system issues or questions.
Disclosure
I receive affiliate commissions from some of the companies and products I discuss. These commissions don't change the price that you pay.
Rest assured that this compensation does not influence my recommendations. I only endorse products and services that I truly believe to be an honest value for you, as a visitor to my site.
For more details, see my full disclaimer.
