- Home
- Compare Systems
- Cheap Systems
- Free Quotes
- DIY Systems
- Hardwired Systems
- Wireless Systems
- Smoke Detectors
- Medical Alarms
- Alarm Monitoring
- Cameras & Video
- Ademco
- ADT Security
- Brinks Security
- Broadview
- DSC Security
- FBI Alarms
- GE Security
- Honeywell
- Link Interactive
- Monitronics
- Moose
- Napco
- Protection 1
- Radionics
- Simplisafe
- Alarm Manuals
- Alarm System Parts
- Alarm Tools
- Troubleshooting
- FAQ
- Glossary
- Sitemap
- About Me
- Contact Me
Envisalink 4 Installation & Account Setup
This is page 1 of a 2-page article on the Envisalink 4 from EyezOn, and describes how to setup an EyezOn account, install the Envisalink 4 module, and connect it to your alarm system.
If you have already created an EyezOn account, installed the EVL module, and are able to connect to the unit using your smartphone or desktop, see the second page, "EyezOn EVL-4EZR Operation".
The EyezOn Envisalink EVL-4EZR is an IP-based interface module designed to work with Honeywell/Ademco Vista and DSC Power-series alarm panels. It allows you to self-monitor and control your system remotely through a web browser or smartphone. You can also set up push alerts, SMS, and email alerts for selected system events including alarms, troubles, arming and disarming, etc.

All of this is possible through the Envisalert service offered by Eyezon. The basic Envisalert plan is free, and is so useful that it will be all many users will need. The more advanced “Envisalert Plus” and “Envisalarm” plans are paid options that offer enhanced functions, up to and including professional monitoring.

At the time of this writing (January 2020) pricing was as follows:
Envisalert Plus Plan: $60/year
Envisalarm Plan: Initial set-up fee of $49. Monthly fee of $8.99/month. If you sign up for a 3-year plan, the monthly cost drops to $8.50/month.
Compatible Panels:
The Envisalink 4 module works with these DSC Power-Series and Honeywell Vista Panels, and is compatible with Alexa.
DSC Power Series: 1555, 1555 MX, 1575, 5010 (832), 5020 (864), 1616, 1832, 1864.
Ademco/Honeywell Vista Series: Vista 20P, 21iP, 15P, 10P, 128P, 250P.
A newer option is now available that lets you self-monitor and control almost any Ademco/Honeywell, DSC, First Alert, or ADT SafeWatch system!
Learn more about the Nexx Smart Alarm NXAL-100 Controller
Where to Buy the EVL-4 Module
The EVL 4 Envisalink EVL-4EZR is available through many online sources, and is priced around $110-120. You can find it on Amazon here:
Envisalink EVL-4EZR at Amazon.com.
You can also order it directly from the EyezOn website here:
EyezOn Store
If you’re a DIYer and want to install the EVL-4 yourself, buy it directly through the EyezOn website or from a reputable online security dealer. This will insure that you’ll be able to get reliable tech support in case you have any problems installing the unit.

If your alarm system is currently being monitored, consult your alarm dealer for information on availability and pricing..
If you have an Ademco/Honeywell Vista-series system, there is one important reminder:
Honeywell/Ademco Vista Users:
If you plan to connect the Envisalink 4 to your Honeywell/Ademco Vista panel, you MUST create an account and activate the device before connecting it to your panel.
Although this isn’t required for DSC panels, EyezOn recommends it, so I chose to create the account first.
EyezOn Account Creation

Visit the EyezOn website at www.eyezon.com, and click on the “Create Account” tab.

Enter a valid email address in the fields provided, then select “Submit Information”. Shortly you’ll receive an email with a login password, to be used in a later step.
Fill in your account information: Name, address, and phone number, then agree to the terms and conditions. Click “Next”.
You’ll see confirmation that your account was successfully created, along with a summary of your information. Click “Finish” to go back to the EyezOn home page.
Check your email for the EyezOn login info, and use it to login to the EyezOn website.

When you log in, you’ll be taken to your “Recent Activity” page, where there are links to manage your account settings and devices. This is also where you can change your login password, when you have a chance.
Next, you need to add your Envisalink-4 device to your account and activate it.

Click on “Add New Device”, then select “Begin Activation”.
Click on the drop-down arrow, and choose a device type from the list. In my case, I chose “Envisalink 4 DSC”. (If you have a Honeywell/Ademco Vista system, select “Envisalink 4 Honeywell”.) Click on “Next”.

Enter the 12-digit MAC address printed on your EVL module, and give the module a name (“EVL 4”, “My House”, etc.)
NOTE: You can easily change the name of your device later by clicking on its icon.
Accept the terms and conditions and click “Next”.
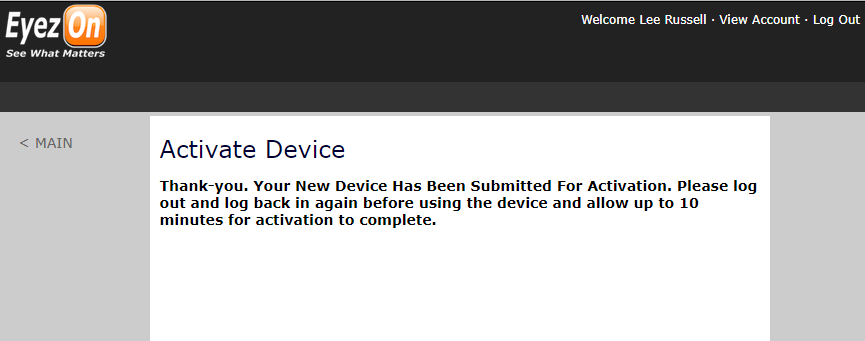
Log out of the EyezOn website, then wait at least 10 minutes.

Log back into the EyezOn website. Your device should appear in the left column as an icon with the device name you entered and its MAC address. If so, your Envisalink 4 has been successfully activated, and you are ready to install it!
If your device doesn’t appear, try logging out, wait a few more minutes, then log back in again. If you still don’t see your device, repeat the steps above.
Installation
Note for Monitored Systems:
If your system is currently monitored via the telephone line or a cellular transmitter, be sure to put your system on “Test” while you connect and check your Envisalink module functions.
This will prevent any nuisance “Alarm”, “Trouble” or other signals from triggering a response while you connect and try out the functions of your Envisalink module.
Installing the EVL-4 module is actually much easier than creating the account, in my opinion. You need to make the panel data bus and home network connections, and mount the module inside your main alarm enclosure.
Envisalink 4 Installation for Honeywell users note:
Be Sure to create an EyezOn account and activate the module on the account before you connect it to the panel.
You'll also need to do some programming in your Vista panel to make it work with the EVL-4 module. For more details, See the Envisalink4/Honeywell Vista Installation and Programming Guide, accessible through the "Help" section while logged in to your EyezOn account.
Basic Envisalink 4 Installation Steps

1. Power-down the main panel by disconnecting one battery lead and unplugging the low-voltage transformer.

2. Connect one end of the supplied 4-conductor cable to the four screw terminals on the EVL module.
3. Install the EVL in the main panel enclosure. This DSC Power 832 can has 4 locations for mounting additional modules, 2 on the left side and 2 on the right, each having (3) mounting holes. Insert the included plastic standoffs into the holes on the metal can from the outside, then snap the EVL module onto the standoffs on the inside of the can.

If you’re adding the EVL to an Ademco Vista system, or if your alarm enclosure doesn’t have mounting holes in the correct locations, mount the module using the included strip of double-sided tape (More on mounting the module later)

4. Connect the free end of the 4-conductor cable to the four data bus terminals of the alarm panel. These are the same terminals used for keypad connections. Be careful not to dislodge any of the existing data wiring.

5. Connect a data patch cord from the RJ-45 connector on the EVL module to an open port on your home network router or switch.
6. Restore AC and battery power to the system.
On DSC systems, the EVL module will be automatically enrolled as a PC5400/DVACS module.
For Honeywell systems, you’ll have to program the panel to enroll the EVL 4. Follow the latest instructions in the Envisalink4/Honeywell Vista Installation and Programming Guide.

A Tip about Envisalink 4 Installation for DSC Users:
Although I initially installed the EVL using the included standoffs, I later removed them and used hook-and-loop tape to attach the board.
I did this for 3 reasons:
- First, the DSC standoff hole pattern orients the Ethernet jack pointing upward, which I don’t like because it can easily collect dust and debris;
- Second, the same standoff layout orients the board with the LED’s at the back of the can, where they are almost impossible to see;
- Third, using the included double-stick tape makes it hard to remove the board to check connections, etc, while hook-and-loop tape makes it easy to do so.

Mounting the EVL module “upside-down” positions the Ethernet connector pointing downward, and the LED’s are right in front where they can be easily checked.
Just my personal preference…

What the on-board LED’s indicate:

The Envisalink 4 has five onboard LED’s to display device status:
OPER (Operation)
SOLID GREEN - Power and functioning
OFF - Not functioning or not powered correctly
KEYB (Keybus)
SOLID GREEN - Panel connected correctly
FLASHING - Panel not connected, DSC firmware installed
OFF - Panel not connected, Honeywell firmware installed
NET (Network)
SOLID GREEN - IP obtained through DHCP
FLASHING - Module programmed to static IP
OFF - Module cannot obtain IP from DHCP server (router)
ONLINE
SOLID GREEN - Module is communicating with servers and account is properly set up
FLASHING - Module is communicating with servers but no account exists
OFF - Module is not communicating with servers
LINK
SOLID GREEN - Ethernet link established. Will flicker with RX/TX activity
OFF - No ethernet link
If any of the status lights on your EVL module indicates a problem, check your wiring connections to the unit, and make sure your account has been set up correctly. You can also click on the “Help” tab in the vertical menu in the EyezOn web page.
Accessing the Envisalink 4
Using the EyezOn App
Download the EyezOn App for iOS or Android to perform basic functions like arming, disarming, bypassing, and viewing system status and zone activity.

Log in to your account from your mobile device using your user name and password.
The Devices “Summary” screen will open, showing the icon for your EVL-4 with the name you’ve given it. Tap on the icon to open the “Status” screen; from here, you can access the app features explained below.

STATUS
The status screen shows the condition of the alarm system - Ready. Not Ready, Armed Stay, Armed Away, etc. There is also a “Commands” button; tapping on the button will allow you to select various commands like arming or disarming the system, etc.
Below this section is the same zone activity grid shown on the web interface. Tapping on the grid pulls up a listing of the most recent events and their time since they happened, just as in the web interface.

EVENTS
This section shows a list of the most recent events (arming, disarming, alarms, etc.) by time and date, user name/number, zone name/number, etc.
HVAC and CAMERAS
These sections are only available after adding additional optional equipment. See the User Guide or the EyezOn web site for more details.
Conclusions for Setup & Installation
At this point, you should have your EVL-4 installed in your alarm panel, and are able to communicate with it using the web interface and/or the mobile app.
To see how to use the EVL-4 menus to customize the operation to your needs, see "EyezOn EVL-4EZR Operation".
If you aren’t able to access your Envisalink 4 device, review the steps above to make sure the setup was done completely. You can also refer to the “Help” section of the User Manual, or contact technical support through EyezOn or your supplier.
Info Accuracy Disclaimer Notice
I’ve made every effort to ensure the accuracy of the information in this article. EyezOn is constantly updating and improving their products, so pricing, plans, and features can change at any time. Always check with your supplier and the EyezOn website for current pricing and the latest product and plan details before ordering.
Do you have an older system that's starting to have problems?
Or, do you have a working system, but no programming information?
Why not get a few Free Home Security Systems Quotes from companies in your area?
RELATED PAGES:
Should I Self-Monitor my Alarm System?
DSC Security Systems (Escort Module)
Return to Home Security Systems Answers from Envisalink 4 Part 1
Return to DIY Home Security Systems
Eyezon resource links:
EnvisaLink 4 Quick-Start Manual
Envisalink4/Honeywell Vista Installation and Programming Guide
EyezOn App for iPhone
EyezOn App for Android
Note: Feel free to print any of the articles on this site for personal, non-commercial use. Just look for this button:
If you found this website especially helpful, you might want to consider making a small donation. Since 2011, AzAlarmGuy has been providing free help and advice on home security systems to all of those in need.
Your gift, in any amount, will help me keep this website a free resource for anyone needing help with alarm system issues or questions.


Disclosure
I receive affiliate commissions from some of the companies and products I discuss. These commissions don't change the price that you pay.
Rest assured that this compensation does not influence my recommendations. I only endorse products and services that I truly believe to be an honest value for you, as a visitor to my site.
For more details, see my full disclaimer.

