- Home
- Compare Systems
- Cheap Systems
- Free Quotes
- DIY Systems
- Hardwired Systems
- Wireless Systems
- Smoke Detectors
- Medical Alarms
- Alarm Monitoring
- Cameras & Video
- Ademco
- ADT Security
- Brinks Security
- Broadview
- DSC Security
- FBI Alarms
- GE Security
- Honeywell
- Link Interactive
- Monitronics
- Moose
- Napco
- Protection 1
- Radionics
- Simplisafe
- Alarm Manuals
- Alarm System Parts
- Alarm Tools
- Troubleshooting
- FAQ
- Glossary
- Sitemap
- About Me
- Contact Me
Nexx Alarm NXAL-100
Setup and Installation
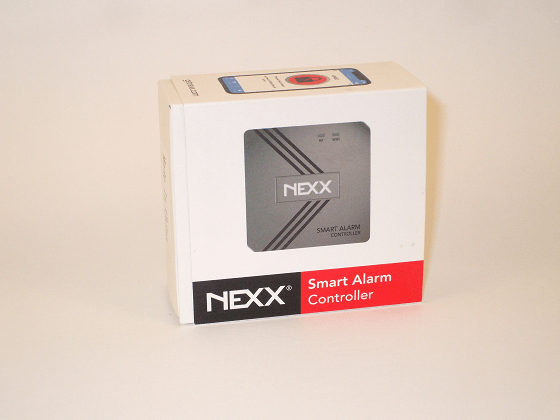
The Nexx Alarm NXAL-100 module may be the best thing to happen to many older alarm systems since they were first created. “Legacy” systems from DSC, Ademco, ADT, and First Alert were originally designed to work with landline telephone connections. These panels could send alarm and other signals only to a central station receiver, meaning there was always a monitoring fee attached.
If you are the owner of one of these older alarm systems, you may have wanted to “upgrade” your existing system to work with your smartphone, just like many/most of the newer systems are able to do.
Until recently, there has been no practical way to add smart device functionality to these old systems, other than the EyezOn Envisalink 4 Module which works only with Ademco/Honeywell Vista-series and DSC Power-series systems.
Unless you happened to have a Vista or Power-series system, you were out of luck…
Now, there is another option!
The Nexx Smart Alarm Module is an add-on module that works with many hardwired and wireless home alarm systems, and adds smartphone access and control to these older systems.
Most of these alarm systems were designed before smartphones were even invented, and were designed to communicate mainly via a landline telephone. Later, cellular transmitters were added to provide backup reporting, but this still required a monitoring contract to enable the service.
The Nexx home alarm module now enables you to receive alerts to your iPhone or Android phone, for free! Of course, the ‘free’ plan has some limitations, and of course Nexx offers a paid plan, but even that costs a small fraction of what traditional monitoring companies charge.
This page is Part 1 of a 2-part article, and describes the steps for connecting and setting up the Nexx Alarm NXAL-100 module with your existing alarm system.
If you’re thinking about getting the module to control your alarm system, but still have questions, learn more on my Part 2 article, Nexx Smart Alarm Review.
Learn more about Self-Monitoring
You may already be familiar with Nexx through some of their other products, including the NXG-100B and NXG-200 Nexx Smart Garage Controllers and the Nexx Smart Plug with App. The garage door and remote control functionality those devices provided is now available for home security systems.
NXAL-100 Installation Steps
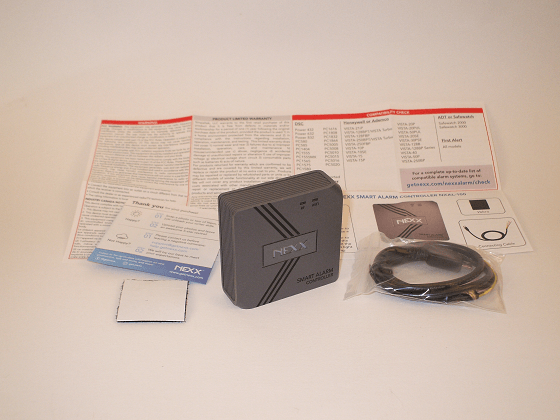
1. Make sure you have the following to complete the installation:
- A working alarm system that is compatible with the Nexx Smart Alarm NXAL-100 (See below for link to checker)
- 2.4Ghz WiFi network
- Smartphone or other device with Bluetooth capability
- Access to the main alarm system box
- Philips screwdriver (for Non-DSC systems)
- Small flat-blade screwdriver (for DSC systems)
- A working arm/disarm code for your system
- For Ademco/Honeywell/Safewatch/First Alert systems, the Installer code
To find out whether your system is compatible or not, use this compatibility checker at the getnexx website.
Once you have everything, continue with the following steps.
2. Enable a Keypad Address for the NXAL-100 (Skip this step for DSC systems)
For Ademco/Honeywell/ADT/Safewatch/First Alert systems:
- Enter the (4-digit Installer Code), 8, 00, *196, 1, 0.
- Enter *99 to exit programming mode.
These steps require you to know your alarm system’s Installer Code. The default is 4112, but yours will likely have been changed to something else. You can recover and/or reset the Installer Code with help from my page here:
Ademco Home Alarm System Code Programming
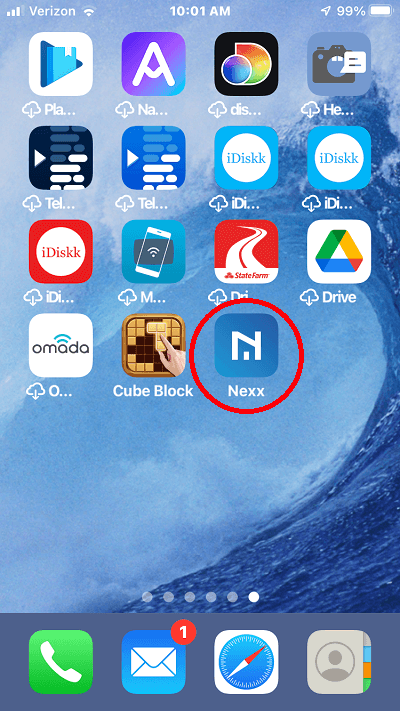
3. Install the Nexx Home app
Download and install the Nexx Home app from the Apple App Store or the Google Play Store.
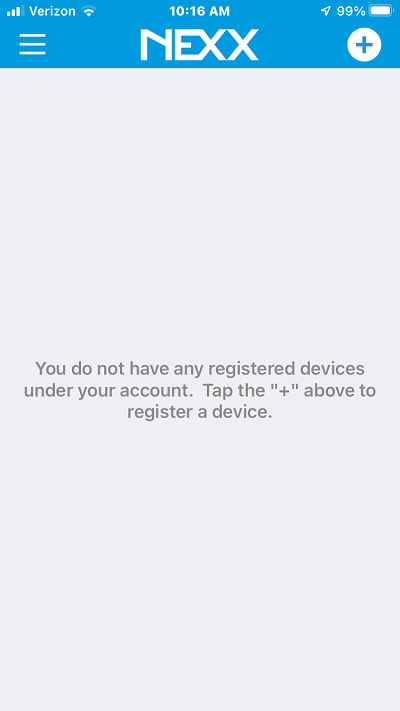
4. Create an Account
Create an account with Nexx. After creating the account, the Nexx app will show that you have no registered devices; in the next steps, you’ll add your device to the account.
5. Connect Nexx Alarm device's connecting cable wires to the alarm panel
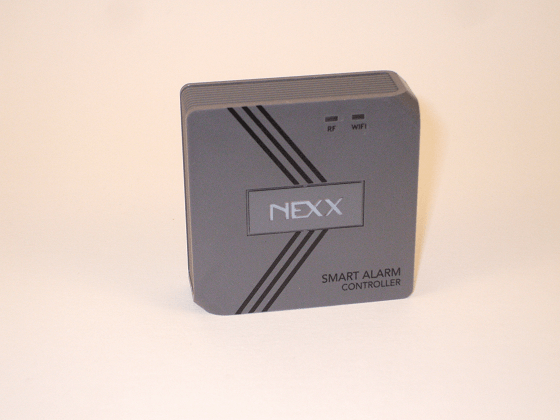
Connect the included cable to your alarm panel’s 4-wire data bus/keypad terminals. Match the cable’s color-coded wires to the alarm terminals as shown below:
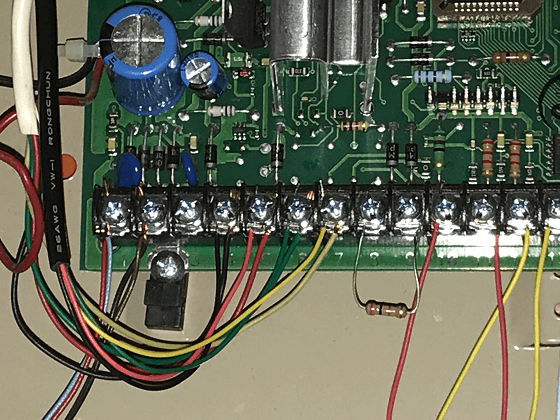 Ademco ADT Data connections, terminals 4,5,6 and 7
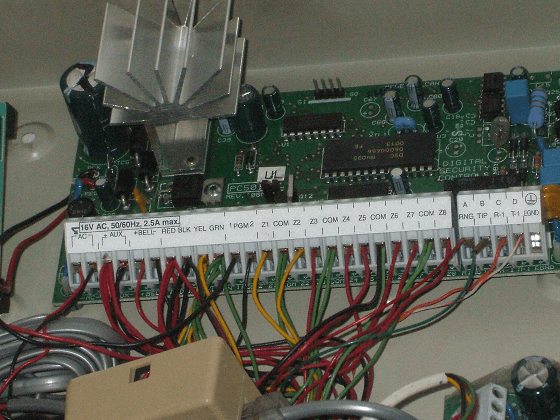 DSC Power 832 Data connections, terminals 7,8,9 and 10
6. Install the NXAL-100 on the Outside of the Alarm Can
Route the connectorized end of the Nexx cable out of the alarm can through any available knockout hole. Install the Nexx Smart Alarm module on the outside of the alarm can using the included hook-and-loop tape.
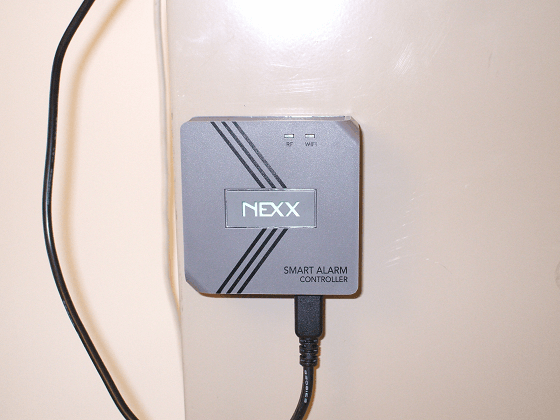
Make sure there is room to access the reset button on the bottom of the module, in case you ever need to reset the unit.
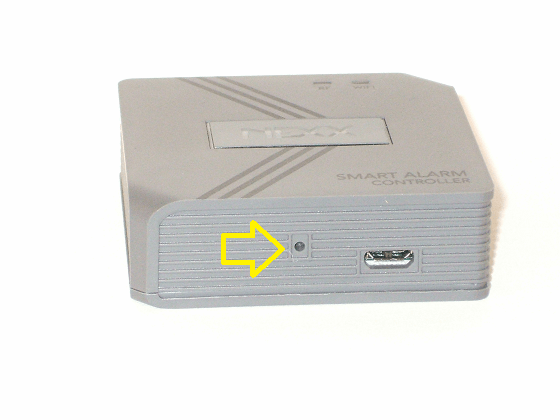 Nexx module Reset button
Connect the cable to the module by plugging it into the data port. Within several seconds, the green “NEXX” logo on the front of the NXAL-100 controller should begin blinking.
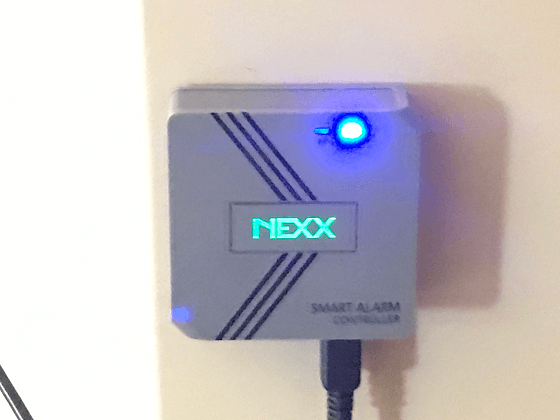
If it doesn’t, reset the module by inserting a paper clip or similar object into the reset hole, and pressing the button.
7. Register the Nexx Alarm NXAL-100 to Nexx Home
Make sure you have the following information handy before starting the next steps:
- The brand and model number of your system (Examples: Ademco/Honeywell Vista 20P, DSC Power 832)
- Your Master Arm/Disarm Code
- Your Installer Code (for Non-DSC Systems)
- The keypad address you programmed in Step 2 (For Non-DSC Systems Only)
- Your WiFi Network Name and Password
With this info at hand, log in to the Nexx Home App on your smartphone. Tap the “+” icon in the upper right-hand corner to add a device. Select the “Nexx Alarm 100” option.
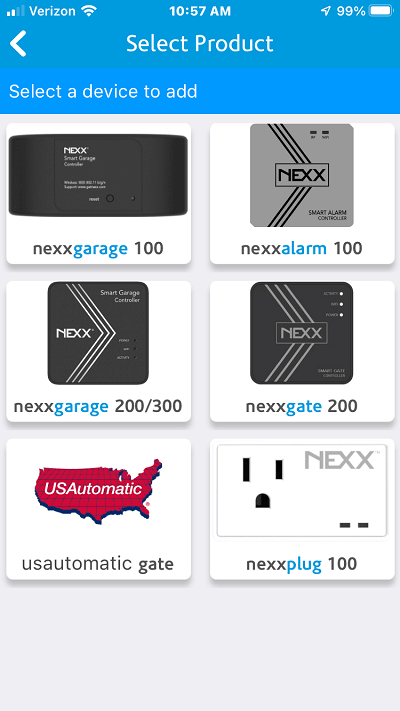
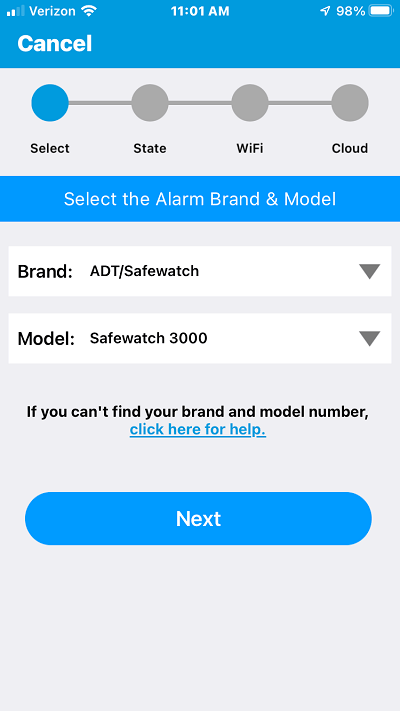
Next, select your alarm system brand and model from the drop-down menus provided.
Type in the Keypad Address you assigned to the NXAL-100 in Step 2. This should be a number between 16-23.
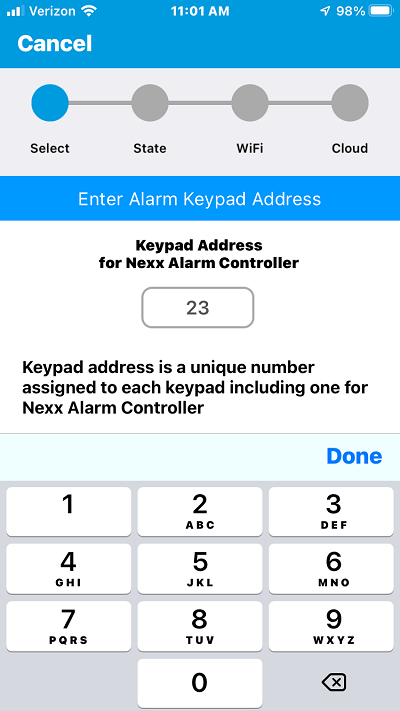
Enter your alarm system Master Code.
Verify that the “NEXX” logo on the module is blinking
Enter your WiFi network name and password. The Nexx module will blink the blue “WiFi” LED while the unit connects to the network.
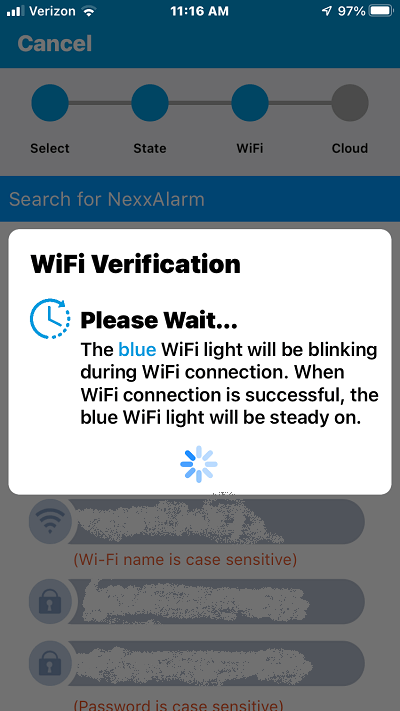
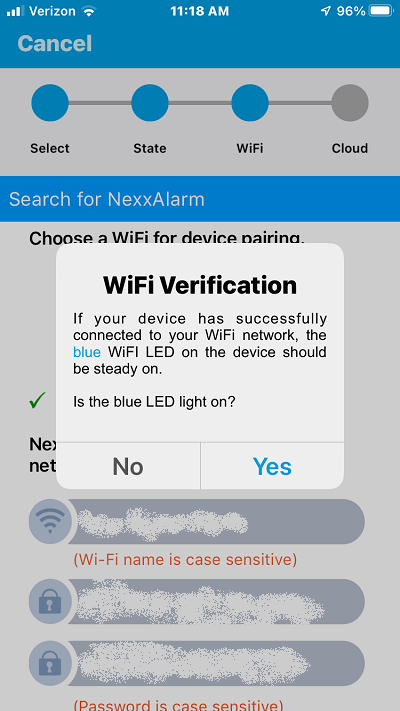
When the WiFi LED goes on steady, tap “Yes” to verify the connection.
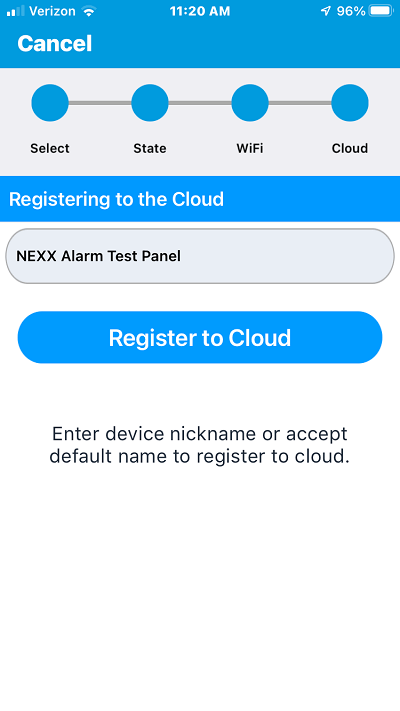
On the next screen, add a name for your alarm system, or accept the default name shown on the screen.
Tap “Register to Cloud” to finish the registration process.
At this point, registration is complete. You may get a notification that the Nexx module needs an update. If so, select “Update Now’ to install it.
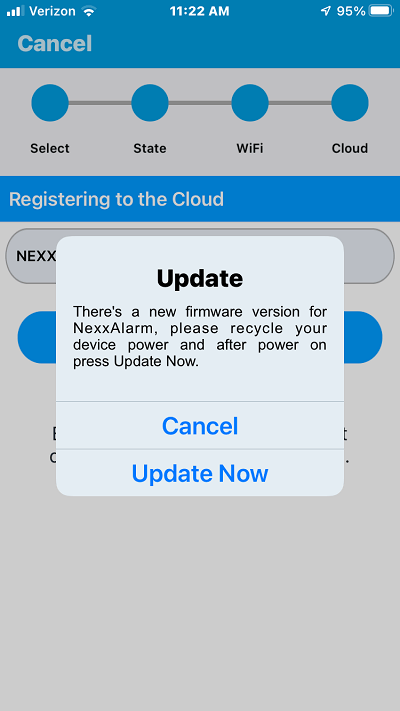
Next, you’ll be prompted to receive notifications and critical alerts from Nexx, and access to Siri shortcuts. Choose the options you want, and then you’re done! You can begin using your Nexx Smart Alarm unit.
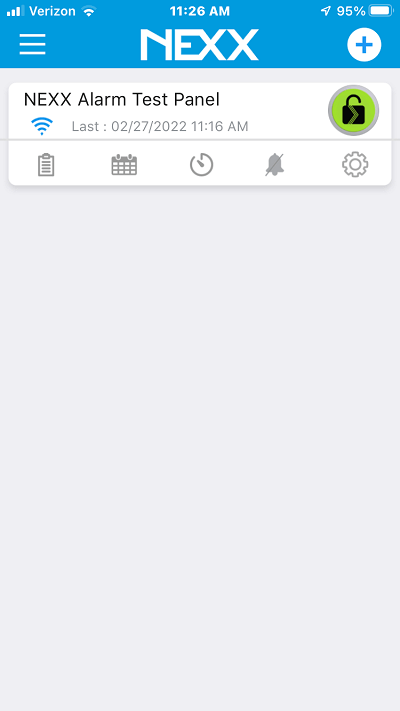
CONGRATULATIONS! YOU’VE COMPLETED THE INSTALLATION PROCESS.
YOU’RE NOW READY TO BEGIN USING YOUR NEWLY-ENHANCED SYSTEM!
All of the above information was correct at the time of writing, but the NXAL-100 module is being continuously improved upon. If any of the above steps don’t seem to match up with the behavior of your module, please refer to the latest Nexx Installation and Setup Instructions here:
Nexx Alarm - NXAL-100 - Setup & InstallationIf adding the Nexx Alarm module seems too involved for you, or if your system just isn't compatible with it, you may be thinking about upgrading to a new alarm system.
Most newer systems have modern features like remote smartphone control already built-in, eliminating the need for add-on modules completely.
You can get free alarm quotes from alarm dealers in your area by answering a few questions below.
The price quotes are completely free, and without any obligation to buy.
How to Use the Nexx Alarm NXAL-100
To Arm and Disarm the System:
In the main listing screen of the Nexx Home app, tap on the name you assigned to your system during setup. A system status screen will appear.
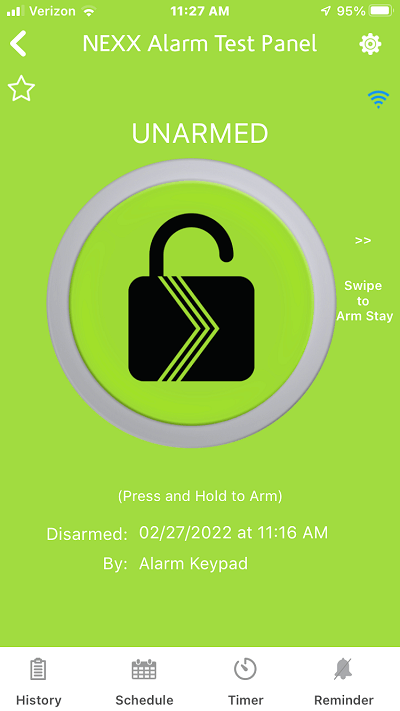
To arm the system in “Away” mode, touch and hold on the padlock icon for a few seconds. Or, to arm in “Stay” mode, swipe right from the middle of the screen.
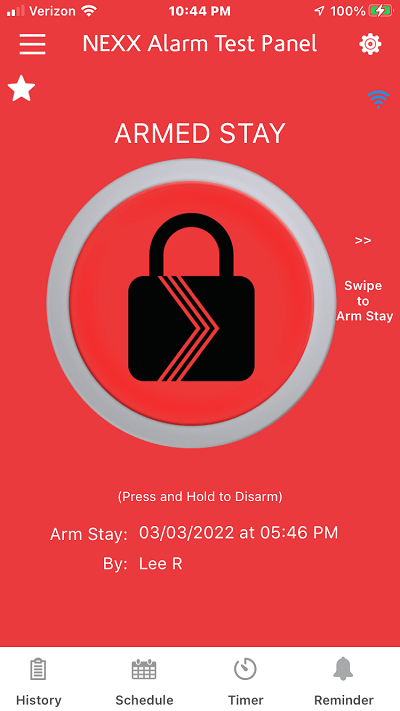
Your alarm system should immediately arm to the specified level.
To disarm, touch and hold on the padlock icon.
Receiving Alarm Messages
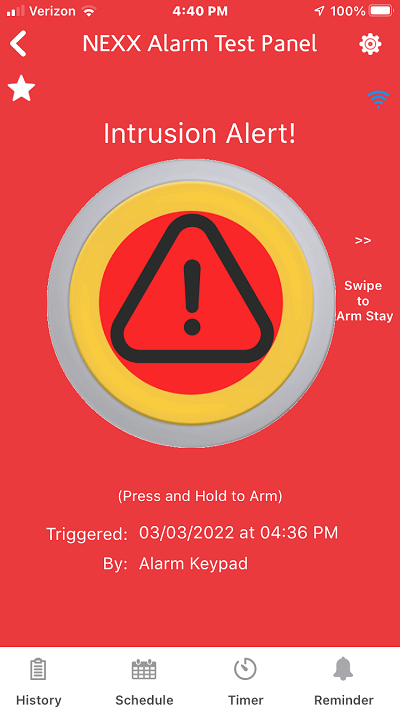
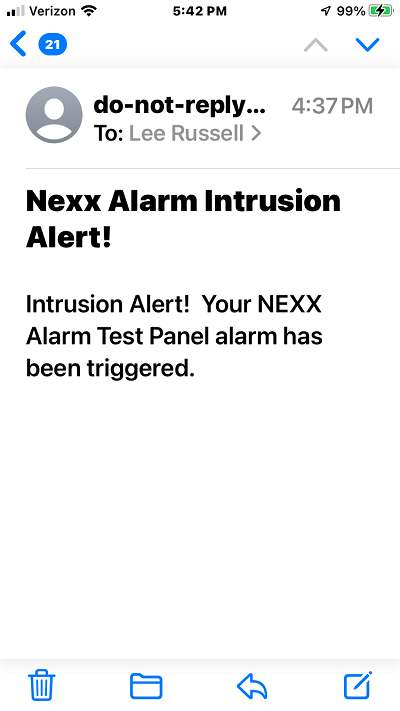
If the alarm system is triggered, it will send alerts according to your choices in the “Notifications” section of the Nexx Home app.
Additional Settings for the NXAL-100
To access other features, tap on the gear icon in the upper right-hand corner of the smartphone display.
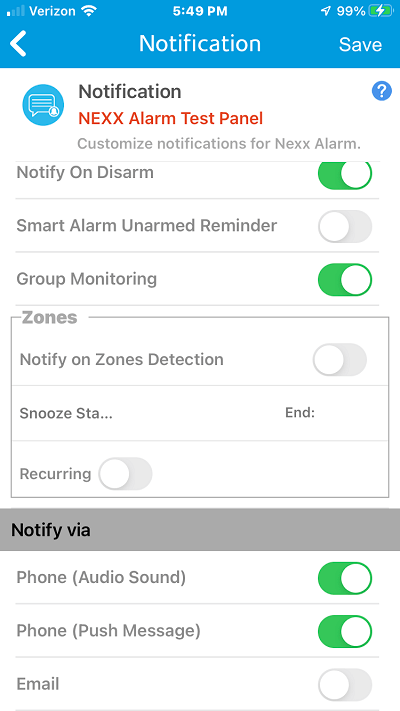
Customize Notifications
This section allows you to choose what types of alerts you want to see, and how they are delivered to you.
After you’ve picked which alerts you want to receive, and whether you want audio, push alerts, or email alerts, be sure to tap the “Save” button in the upper right-hand corner of the app display. Otherwise, you’ll receive all of the alerts by default.
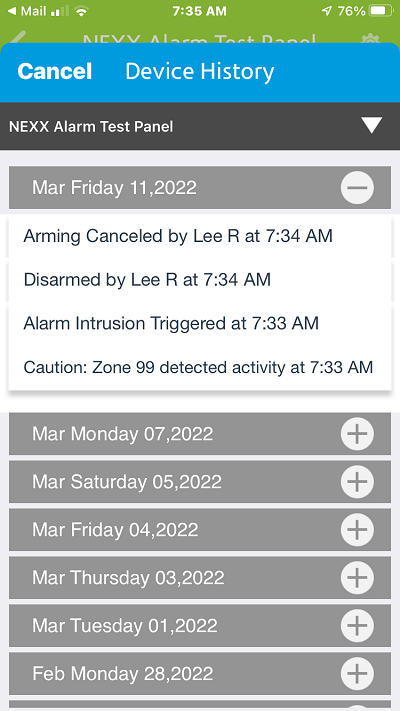
History Tab
With the Nexx Alarm free plan, you have access to History Reports, which list system events like armings/disarmings, alarms, and other alarm conditions. These events are listed in the app itself, as well as being sent to your smartphone or other device according to the settings you provided earlier.
Schedule and Timer Tabs
The “Schedule” and “Timer” tabs are Pro Plan-only features that allow you to set dates and times to automatically arm and disarm the system. They can also be set to repeat the actions every day, like arming at 10PM and disarming at 6AM.
Reminders Tab
The “Reminders” (Pro Plan-only) feature can let you know when it’s time to leave the premises and arm your system.
Standard Plan Settings are Now Complete!
If you are using the free standard plan, setup is complete. You can begin using the system and trying out how everything works.
Note that with the free plan, only the “History” tab is accessible. The “Schedule”, “Timer”, and “Reminder” tabs become usable only if you choose to upgrade to the Pro Plan.
If you're considering adding the Nexx Alarm module to your security system, I'll have more details in a follow-up article.
Related Pages:
Should I Self Monitor My Alarm System?
Return to Home Security Systems Answers from Nexx Alarm
Return to DIY Home Security Systems from Nexx Alarm
Note: Feel free to print any of the articles on this site for personal, non-commercial use. Just look for this button:
If you found this website especially helpful, you might want to consider making a small donation. Since 2011, AzAlarmGuy has been providing free help and advice on home security systems to all of those in need.
Your gift, in any amount, will help me keep this website a free resource for anyone needing help with alarm system issues or questions.
Disclosure
I receive affiliate commissions from some of the companies and products I discuss. These commissions don't change the price that you pay.
Rest assured that this compensation does not influence my recommendations. I only endorse products and services that I truly believe to be an honest value for you, as a visitor to my site.
For more details, see my full disclaimer.
