- Home
- Compare Systems
- Cheap Systems
- Free Quotes
- DIY Systems
- Hardwired Systems
- Wireless Systems
- Smoke Detectors
- Medical Alarms
- Alarm Monitoring
- Cameras & Video
- Ademco
- ADT Security
- Brinks Security
- Broadview
- DSC Security
- FBI Alarms
- GE Security
- Honeywell
- Link Interactive
- Monitronics
- Moose
- Napco
- Protection 1
- Radionics
- Simplisafe
- Alarm Manuals
- Alarm System Parts
- Alarm Tools
- Troubleshooting
- FAQ
- Glossary
- Sitemap
- About Me
- Contact Me
Fishing Wires for a Home Security System
How to Fish Wire Through the Attic
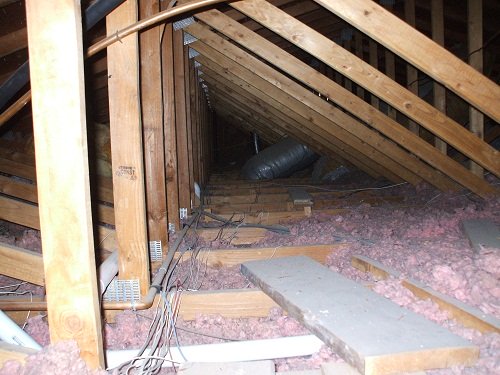
This page explains the steps for fishing wires in a house with attic access, which includes most homes having a pitched roof. Whether you’re a professional alarm installer or a homeowner installing a DIY security system, you’ll find some tips here that will make the job easier.
Here I’ll focus on the work of the “attic rat”, the poor slob whose job it is to crawl through the attic space running wires. S/he must pull wires from the main panel location out to each alarm device in the system. Wires can then be attached to the end of a fish tape, and pulled down to their final locations.
The other half of the team, the “ground man”, is
responsible for getting a fish tape up into the attic, hopefully where
the attic rat can easily reach it. See all about how to fish wire in
“Using a Fish Tape for Home Alarm Wiring”
Before fishing any wires, a 3/8-inch hole should be drilled up into the
attic from each door, window, and other home security devices. See how
this is done on the
“Using Long Drill Bits” page.
Planning Wiring Runs
Walk the house with your ground partner, and decide which wires to pull in each run across the attic. You can usually group several together in the same area of the home, rather than doing them one at a time.
If you need help knowing what to run, check out this page on Home Alarm Wiring. It lays out everything you might need for a complete system.
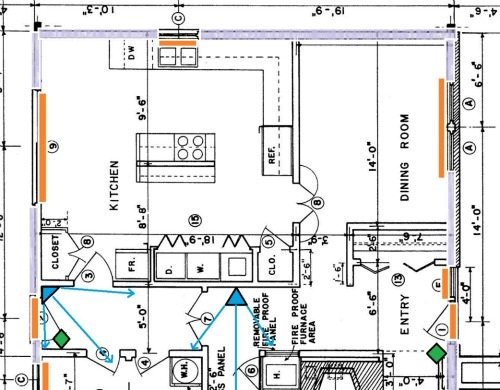
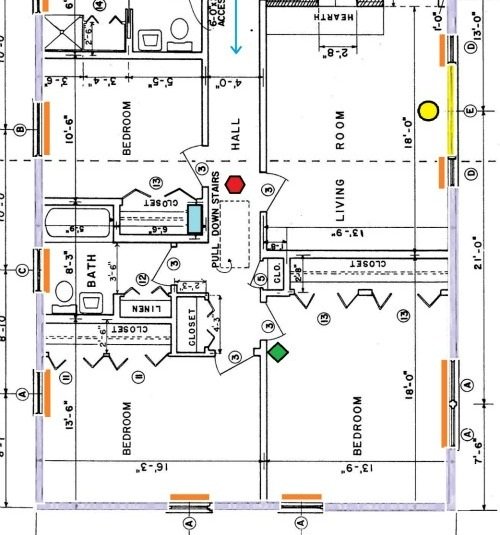
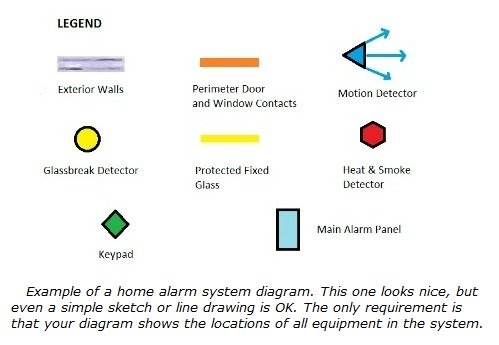
If you’ve made a home alarm wiring diagram marked with all the alarm equipment locations, refer to it as well. This makes it easy to see what can be pulled together, and more importantly, it prevents you from skipping anything. It’s no fun to come down from an attic, get cleaned up and cooled off, then discover you’ve missed running a wire! (Bet you’ll never guess how I know this…).
Once you have a plan for handling all of the runs, it’s time for a little prep work.
Prepare for Fishing Wires
- Get prepared for the attic by hydrating yourself well. You’ll probably sweat more than you may think, even in cool weather.
- Always wear a well-fitted dust mask, to avoid inhaling dangerous fiberglass insulation particles.
- Kneepads come in handy, and will protect your pants knees as well as your own.
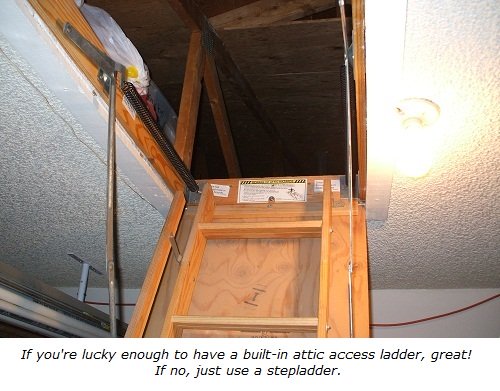
Set up a ladder at the scuttle hole that will allow you easy access to
the attic. Whenever possible, the alarm layout should place the main
panel near a scuttle hole or other attic access point. This allows you
to run wires to all the devices directly from the scuttle hole, rather
than also having to fish them up at the panel location. When all the
runs are finished, they can be dropped down in one bundle to the alarm
panel.
Here are the tools to take with you into the attic when fishing wires:
- Flashlight, or keep both hands free by using a Headlamp
- Wire Strippers
- Electrical Tape
- Grab Hook made from a short length of fish tape
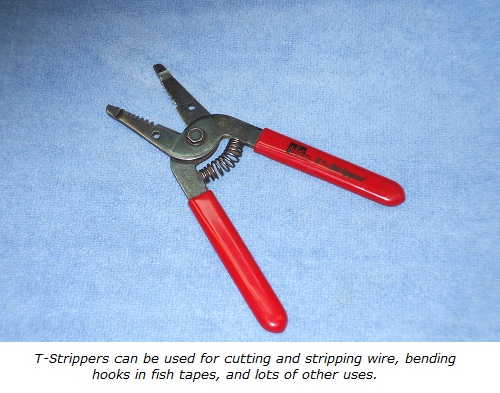
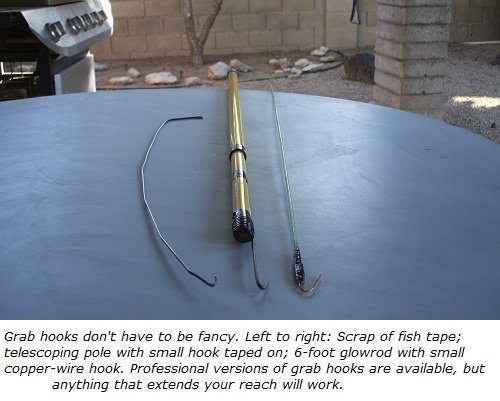
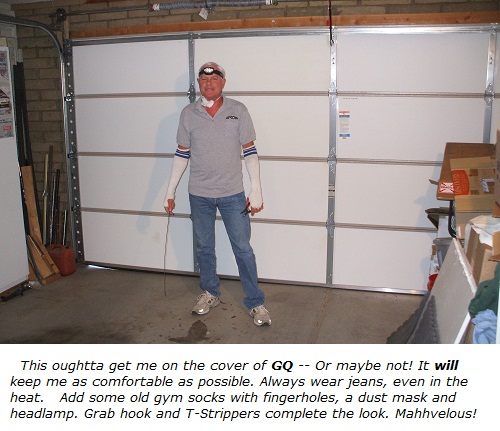
OK then. Are you prepared? Tools all ready? Do you look like the picture above? If so, sorry... Here we go!
Steps for Fishing Wires
Begin your first pull by climbing into the attic, and taking the wires handed up by the ground man. Head toward the first area, using any catwalk or boarding that may be in place. Many attics don’t have any provision for this, so you’ll have to stretch across the rafters.
CAUTION:
While fishing wires, never place your weight on the ceiling drywall only. It will not support you, and you could fall through.
As you move through the attic, notice the triangular trusses supporting
the roof. Most tract homes will have these framing members spaced apart
at 16-24-inch intervals.
Move insulation to one side until you can see the wooden framing members, and put your body weight on these.
Decide which path is the best for you to follow. This should give you as much headroom as possible, with no large obstacles in the way.
Next, choose the best pathway for the alarm wires. These two paths may or may not be the same. Usually, wiring can simply be pulled along with you the whole way. If not, you may be able to run the wires above or beside you through truss framing. This will keep the alarm wiring safe from future attic crawlers, who may step on it or get tangled in it.
If other wiring has already been retrofitted, and is running where it won’t get stepped on, run yours the same way. If not, route them the best way you can find.
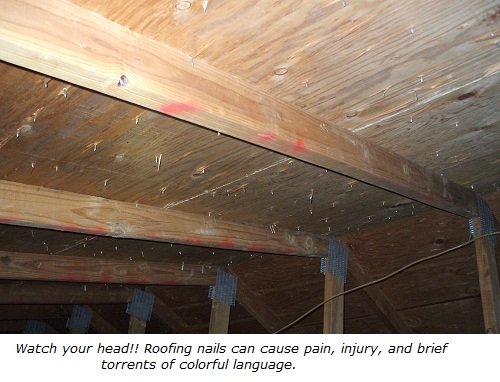
As you get near the first drop, listen for the sound of the fish tape. More specifically, listen for the fish tape in the attic. It will make a dull noise while inside the wall, and a much clearer sound once it reaches the attic space where you are.
If you can see the fish tape, use your grab hook to snag it. Usually you won’t see the actual end of the tape. Instead, the end will quickly catch on something, and the body of the tape will curl into a large loop. Just pull on the loop, and at some point the end will pop free.
After grabbing it, give the fish tape a good tug, to let the ground man know that you have the tape in hand.
Tip:
Why not just communicate by speaking or yelling? If conditions allow it, then please do!
In many cases though, common household noise from TV’s, radios, and
voices can make it hard to hear each other. You’ll need another way to
communicate…
To avoid confusion, I recommend using two different signals:
First, use a good tug on the tape to signal that you have hold of
it. This lets the ground man know he can stop moving the tape around.
Second, use several quick taps on the fish tape with your cutters
after attaching the wire. This tells the ground guy you want him to
pull the tape back down.
The tugging and vibration from tapping can be felt through the fish tape, even in a noisy house.
Next, thread the first wire through the eye in the end of the fish tape. Pull at least a foot or so through, then wrap the end back around on itself several times.
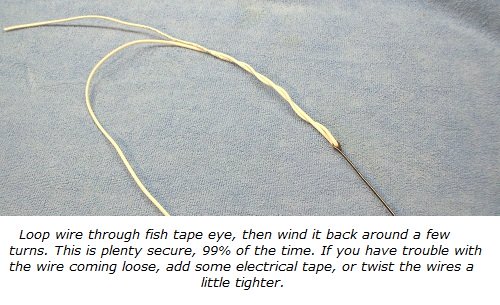
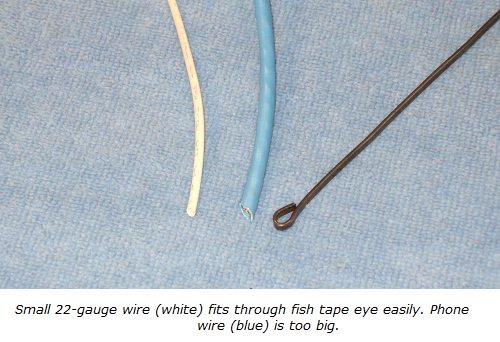
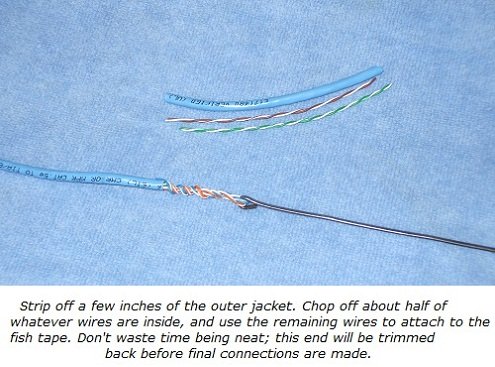
When fishing wires that too big to fit through the eye, such as telephone cable, use the strippers. Remove several inches of the outer jacket, then cut off most of the wires inside. Thread the remaining few wires through the eye of the tape, and twist them securely. Add a few turns of electrical tape to help taper the cut off end, so it won’t snag when being pulled back. After the wire is attached, signal the ground guy to pull the tape back by tapping on it with your cutters, or by shoving it back and forth quickly.
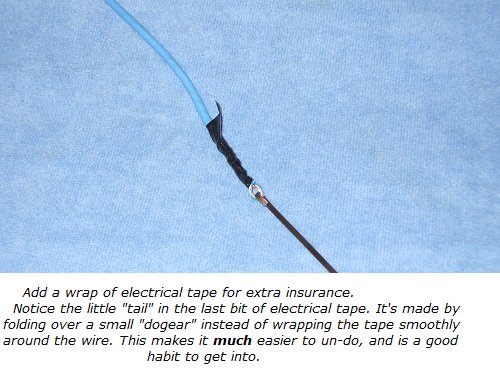
As the ground man pulls the wire down, pull more slack from the box or
spool end. Keep feeding it along until the ground guy signals that he
has enough length.
Great! One wire down, many more to go!
Move to the next wire location, retrieve the tape, tie the wire on, and
repeat. When all of the wires for that pull are done, return to the
scuttle hole. Your helpful ground man will cut the wires from their
spools or boxes, and hand up a fresh set of wires for the next pull.
After you’re done fishing all of the wires, the ground person will gather up all the ends at the scuttle hole. After taping them into a bundle, he’ll hand them up to you. Move to the main alarm panel location, and feed the wires down the hole in the top plate.
Be sure that no burglar alarm wire is crossing a spot where it could be easily damaged. If any wires are running over the scuttle opening or the catwalk, re-route them out of harm’s way and send them down to the panel location.
At this point, you should be all done fishing wires. Check with your ground man, who will verify that all runs are finished. Then, happily, you can exit the attic space, close the scuttle lid, and take a well-deserved break.
Timeframes for Fishing Wires
How long should all of this take? Your mileage may vary, but two experienced installers will spend about 30-60 minutes fishing wires in an average 2,000-3,000-square foot house. This is just attic time; drilling must be done beforehand, and switches and other equipment must be installed afterward.
Smaller homes will go faster, and can even be done by one person.
Larger homes with 20 or more openings and devices can be done in
stages, if necessary. Begin by fishing wires in one wing/end/section,
and then install those switches and devices. You can then fish wires in
the next section another day, and continue until the job is done.
To see how to install hardwired switches in doors, check out
“Installing Magnetic Door Switches – Recessed Type”.
If you haven't done so already, get a few Free Home Security Systems Quotes from companies in your area.
This will give you a good idea of what it would cost to have a system installed, as well as how much you could save by doing it yourself.
Related Articles
Choosing Fish Tapes for Home Alarm Wiring
Using a Fish Tape to Install Home Alarm Wiring
Return to Home-Security-Systems-Answers from Fishing Wires for a Home Security System
Return to from DIY Home Security Systems from Fishing Wires for a Home Security System
Note: Feel free to print any of the articles on this site for personal, non-commercial use. Just look for this button:
If you found this website especially helpful, you might want to consider making a small donation. Since 2011, AzAlarmGuy has been providing free help and advice on home security systems to all of those in need.
Your gift, in any amount, will help me keep this website a free resource for anyone needing help with alarm system issues or questions.
Disclosure
I receive affiliate commissions from some of the companies and products I discuss. These commissions don't change the price that you pay.
Rest assured that this compensation does not influence my recommendations. I only endorse products and services that I truly believe to be an honest value for you, as a visitor to my site.
For more details, see my full disclaimer.


