- Home
- Compare Systems
- Cheap Systems
- Free Quotes
- DIY Systems
- Hardwired Systems
- Wireless Systems
- Smoke Detectors
- Medical Alarms
- Alarm Monitoring
- Cameras & Video
- Ademco
- ADT Security
- Brinks Security
- Broadview
- DSC Security
- FBI Alarms
- GE Security
- Honeywell
- Link Interactive
- Monitronics
- Moose
- Napco
- Protection 1
- Radionics
- Simplisafe
- Alarm Manuals
- Alarm System Parts
- Alarm Tools
- Troubleshooting
- FAQ
- Glossary
- Sitemap
- About Me
- Contact Me
Adding a Vent Zone to a Home Alarm System
A vent zone is a neat alarm trick that can be used with hardwire contacts on sliding doors and windows. Its purpose is to allow a home security system to be armed, even with a door or window partially open. This lets in fresh air when the weather is nice, and can be used when an evaporative cooler must be vented outside the home.
A vented sliding door will also allow smaller pets to come and go, while still providing good sliding door security.
Zone venting is usually a feature found in custom designed security systems, but it isn’t difficult or expensive to do. It is one of the best home alarm system add-ons ever, and is easy enough for DIY home security systems.
For tips on the best ways to plan for venting, see these pages:
Burglar Alarm Wiring for Securing Doors
Burglar Alarm Wire for Protecting Windows
House security systems usually require all magnetic reed switches to be closed before they can be armed. If any zone is left open, the system will respond by beeping an error tone, and will fail to arm.
Venting “fools” the alarm panel into thinking the opening is closed, even though it’s open slightly. This can help keep a home more comfortable, without sacrificing alarm protection.
Vent Zone Requirements
Venting a zone does not require any re-wiring; it is strictly a mechanical feature.
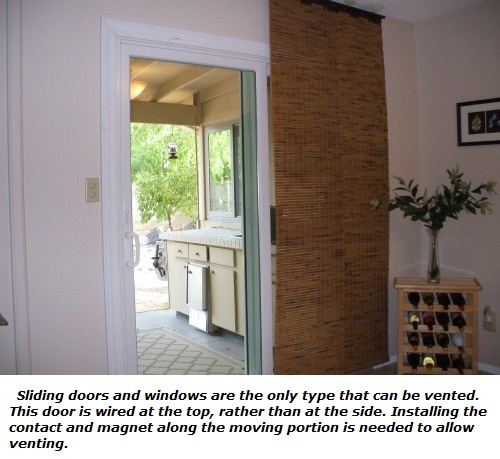
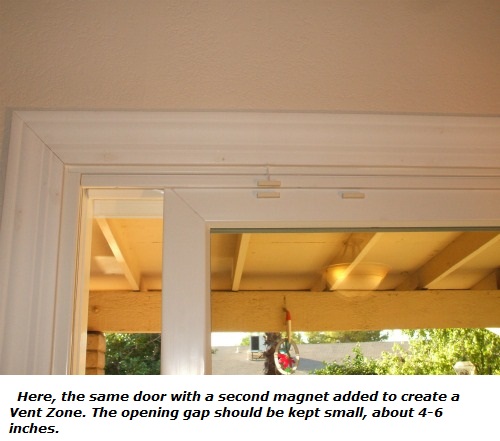
You can vent an opening simply by adding a second magnet to the moving panel of almost any door or window. This activates the window or door sensor whether the opening is in the closed or vented position.
Obviously, the vent opening must be kept small enough to prevent someone
from slipping through. Most alarm companies will use a vent opening of
about 4-6 inches.
Venting is only possible with sliding-type openings, and requires the door or window sensor and magnet(s) to be mounted along one of the moving sides. If the magnetic contact is installed in the latching side, there is nowhere to place the second magnet.
Also, the magnets must have clearance through the entire range of motion of the movable portion. On many sliding doors, for instance, the fixed panel of the door is the inner of the two. This may not leave enough room for surface mount magnets when the door is opened fully.
Pinning a Vent Zone
A vented opening should always be secured with some kind of pinning device, to prevent false alarms.
“Pinning device” is my clever term for anything that holds the door or window in the vented position. A nail, screw, bolt, or pin running through a small hole drilled in both frames is the easiest way to do this.
Special security pins, designed just for this purpose, can be found in any home improvement center. They even come complete with a chain and holder.
Special lever-latches can also be used for pinning a vented opening. Most lever latches have a stout metal pin that is pushed up into a hole in the top of the frame, securing the door or window.
These latches were originally intended as additional security for sliding doors, but you can use them to secure a vented door or window by simply drilling a second hole at the vent position.
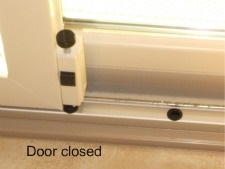
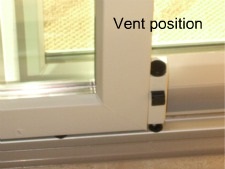
Newer replacement windows and doors often have a built-in stop, window latch, or foot bolt. These give you an easily repeatable gap setting, and work great for setting up a vent zone.
If you're renting your house, you may not want to drill holes for the devices shown above.
Thumb screw latches can be used to pin sliding windows and doors, and can be set without tools.
You can also use a patio door security bar to keep the door from opening beyond the desired distance. A broomstick or dowel cut to length works, and commercial versions are available that can be adjusted to match any vent opening you want to set.
Setting Up a Vented Opening
To vent a door or window, first open it to whatever size gap you’ve chosen. Four to six inches is recommended, or you can just use any existing door or window stop there may be.
Hold the pinning device in position, and mark any holes that need to be drilled.
Drill the holes carefully, matching your pencil marks as closely as possible.
Caution:
Be careful NOT to drill into the door glass!
Always check to see where the channel of the door frame carries the glass before drilling.
After drilling, I like to de-burr the edges of each hole. This will help the opening to slide smoothly, as well as allow the pin to enter freely.
Mount the pinning device with screws. Check the sliding portion for smooth functioning, and make sure it latches and unlatches easily.
Install the extra magnet next. Open the door to the vent position, and engage the pinning device. Clean the surface of the moving panel frame of any grease, and then attach the magnet in alignment with the magnetic door switch.
The opening will now have two “closed” positions, as far as the alarm panel is concerned. The first is the “real” closed position; the second is the “vented” position.
Continuous Venting
Notice that venting with the method shown above requires that the door or window be in placed in the vent position before the system is armed. Moving the panel from the closed position to the vent position after arming will set the alarm off.
One way around this is with a product called the Magalign. This is a specially designed magnetic device that gives a continuously vented gap of 6 inches. This allows you to move a window or door from closed, to vent, and back again, or anywhere in between, without setting the alarm off.
You'll still need to use a lock or pinning device, to prevent sliding the opening too far.
For more info, visit Magaligninc.com.
As mentioned earlier, sometimes there isn’t enough clearance to slide a door completely open without sheering off the door magnet. If you don’t usually require the vent zone door to open fully, you can simply use a stopper stick in the track to keep the magnet from hitting.
Adjustable security bars are available, but a section of wood dowel cut to length works fine also.
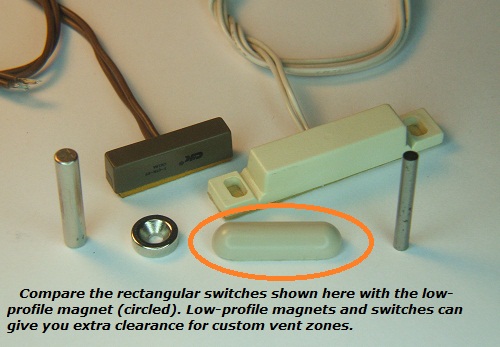
If you do need the full width of the vent zone opening, check to see if low profile or flat magnets would allow enough clearance. Flat magnets are usually rectangular, and about 1/8” thick. They can be attached using double-sided tape, with a small bead of caulking along the sides for added strength.
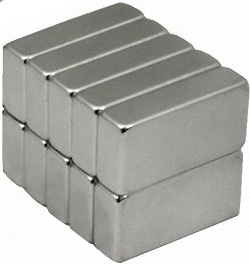 Photo by Homesecuritystore.com
If there isn’t even room for flat magnets, it may be possible to use recessed magnets. They must be drilled close enough to the outer door or window frame to trigger the magnetic reed switch reliably. Also, be very careful you don’t drill into the glass area of the frame. Special donut magnets are good for situations like this, and only need to recess about 1/8” to 3/16” or so into the surface.
It’s best to secure a donut magnet with a screw through the center hole. If this isn’t possible due to glass location, the magnet can be secured with caulking only.
Vent Zone Alternatives
The only other option for ventilation while still securing an opening is through the installation of an alarm screen.
Alarm screens are used along with regular alarm contacts for doors and windows. They are fairly expensive, high-maintenance, and pretty user-unfriendly, especially on sliding doors. I highly recommend venting instead. It's quick, cheap, low maintenance, and easy to do.
Besides a vent zone or using a security screen, the only other choice would be to bypass the zone entirely when arming the system.
Conclusion
If you’re considering having a custom security system installed, include vent zones in your plans if you think you might need them. Venting is a low-tech but useful feature that can be added to most DIY alarm systems as well, with very little trouble or expense.
Return to Home-Security-Systems-Answers from Adding a Vent Zone
Return to Compare Home Security Systems from Adding a Vent Zone
Note: Feel free to print any of the articles on this site for personal, non-commercial use. Just look for this button:
If you found this website especially helpful, you might want to consider making a small donation. Since 2011, AzAlarmGuy has been providing free help and advice on home security systems to all of those in need.
Your gift, in any amount, will help me keep this website a free resource for anyone needing help with alarm system issues or questions.
Disclosure
I receive affiliate commissions from some of the companies and products I discuss. These commissions don't change the price that you pay.
Rest assured that this compensation does not influence my recommendations. I only endorse products and services that I truly believe to be an honest value for you, as a visitor to my site.
For more details, see my full disclaimer.
