- Home
- Compare Systems
- Cheap Systems
- Free Quotes
- DIY Systems
- Hardwired Systems
- Wireless Systems
- Smoke Detectors
- Medical Alarms
- Alarm Monitoring
- Cameras & Video
- Ademco
- ADT Security
- Brinks Security
- Broadview
- DSC Security
- FBI Alarms
- GE Security
- Honeywell
- Link Interactive
- Monitronics
- Moose
- Napco
- Protection 1
- Radionics
- Simplisafe
- Alarm Manuals
- Alarm System Parts
- Alarm Tools
- Troubleshooting
- FAQ
- Glossary
- Sitemap
- About Me
- Contact Me
Installing Magnetic
Door Switches
Recessed Type
Recessed magnetic door switches are made with the same magnetic reed switches used for surface-mount alarm contacts. Instead of a rectangular housing, recessed alarm contacts have a cylindrical case. This makes them easy to install, just by drilling a hole of the proper diameter. The magnets are also designed with the same type of cylindrical housing.
Find information on surface-mount contacts.
Recessed magnetic switches are one of the most commonly used devices to protect doors in wired alarm systems. Recessing the switch makes it almost invisible, and the cases are available in several colors to match different door finishes.
For just a few examples of available window and door sensors, see this page on Honeywell Switches.
There are two standard diameters of recessed switches: 3/8" and 1/4". The
larger 3/8" size is easier to work with, and are the most widely used.
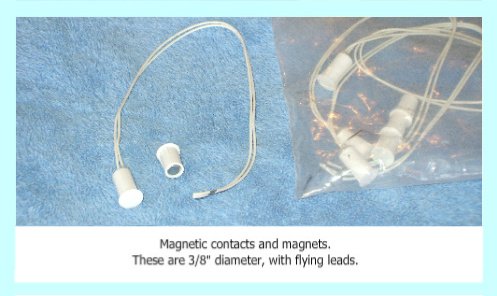
Recessed mount magnetic switches are usually installed after the doors have been hung, for new construction. This allows the magnets to be put in at the same time.
For existing homes, switches and magnets are installed along with the rest of the equipment in the system.
The steps below assume the doors of the house have been wired,
either during initial construction or afterward. To see how it's done,
check out Using Long Drill Bits for Alarm Wiring in Doors.
Looking for recessed switches? Click here, or on the link at the bottom of this page.
Preparing Leads on Magnetic Door Switches
Remove a few inches of outer jacket on each wire, then strip off about 1/2" of the insulation on each conductor. Twist the bare copper of the switch leads and the wires together, then finish using either solder and tape or crimp-type B-connectors for each joint.
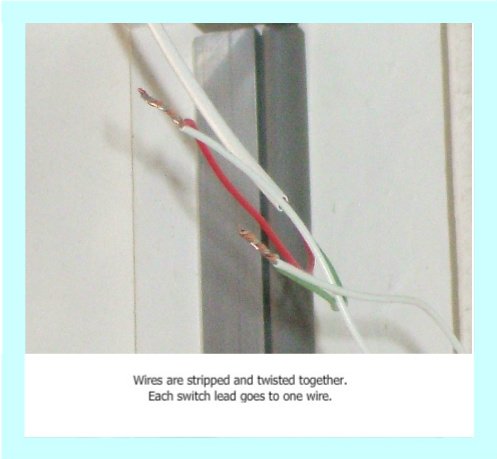
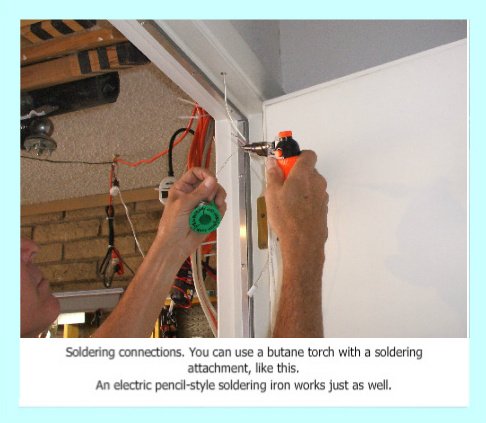
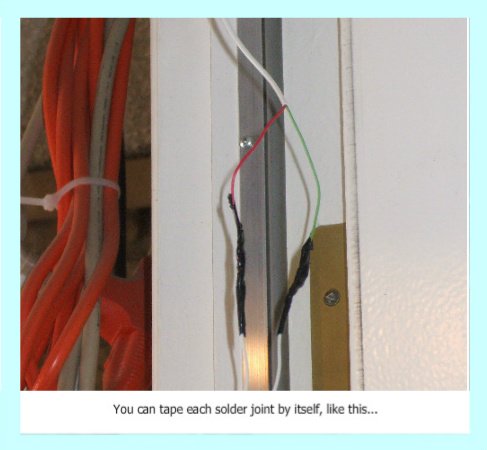
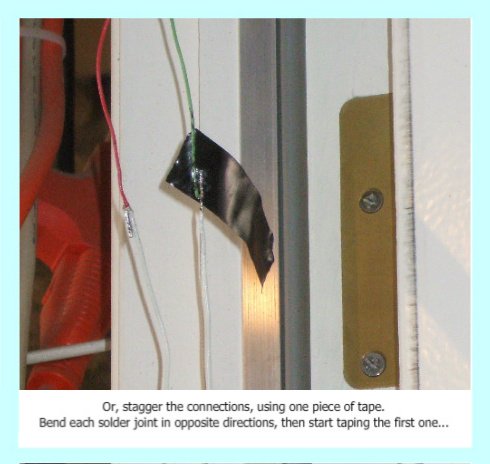
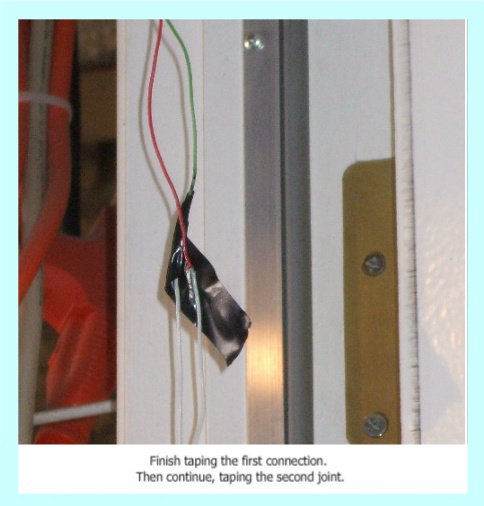
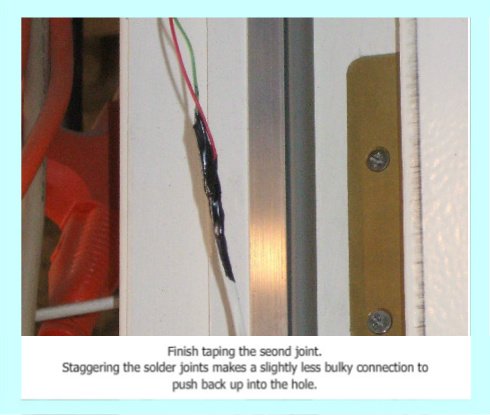
Feed the wiring back up the hole in the doorframe. Twisting the wires together usually helps make this easier. While holding the wire, spin the switch several times to wind up the wires. This twisted braid will be much easier to push back into the opening.
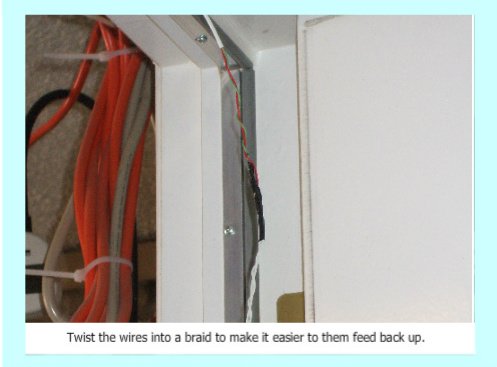
Sometimes wires are brought out through a hole in the doorframe that doesn't line up with the hole into the wall cavity. This can make feeding the wires back in almost impossible. Try "helping" the wire along using a small, flat-bladed screwdriver or needle-nose pliers.
If this doesn't work, double drilling is the quickest way to go. This is nothing more than drilling a second hole alongside the original one. This is drilled deep enough to stuff the wiring inside, until the switch can then be seated fully.
Before drilling, look closely to see which direction the wire is coming from. Then, drill on the opposite side, to avoid hitting the wire.
Feed the wiring into the new space, and seat the switch as usual. Fill the empty hole with caulking, and smooth it flat with a putty knife, credit card, or a piece of cardboard.
Do you have an older system that's starting to have problems?
Or, do you have a working system, but no programming information?
Why not get a few Free Home Security Systems Quotes from companies in your area?
Setting the Magnetic Door Switches
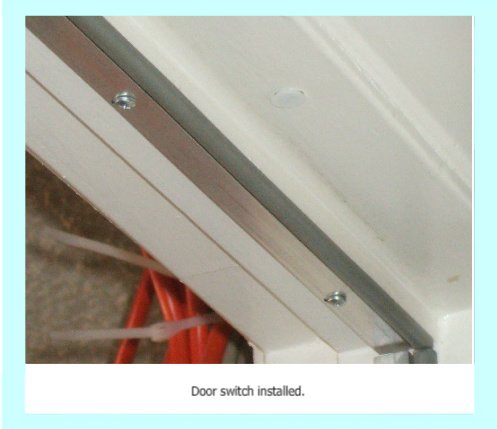
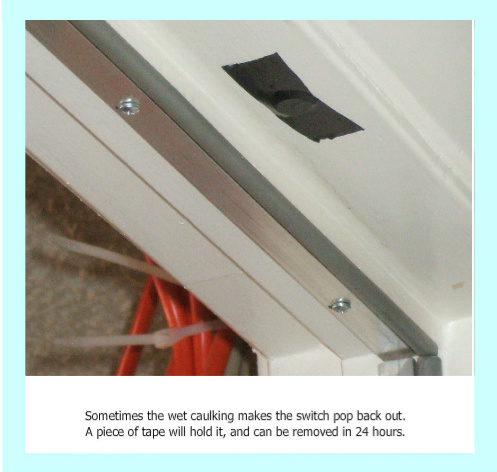
Just before setting the magnetic door switches, squirt a small amount of latex caulking into the hole. If the switch tries to pop back out, use a piece of tape to hold it in place.
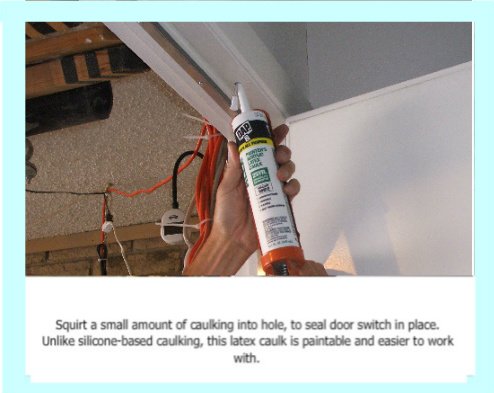
Once the caulking sets in about 24 hours, you can remove the tape. Sealing magnetic door switches will keep them from falling out due to the door slamming or the wood shrinking.
Use latex caulking instead of the silicone type whenever possible. Not only is it paintable, but it doesn't keep tape from sticking. And, it cleans up easily with soap and water.
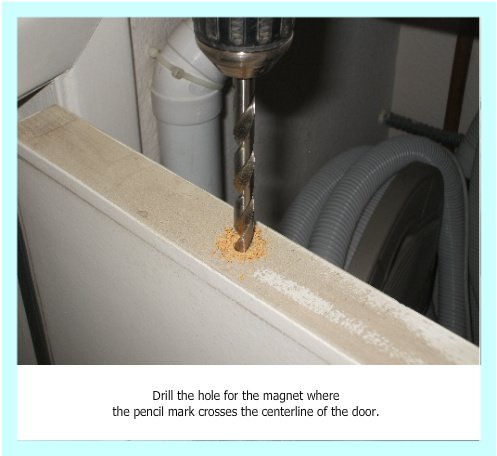
Mark the Door for Drilling
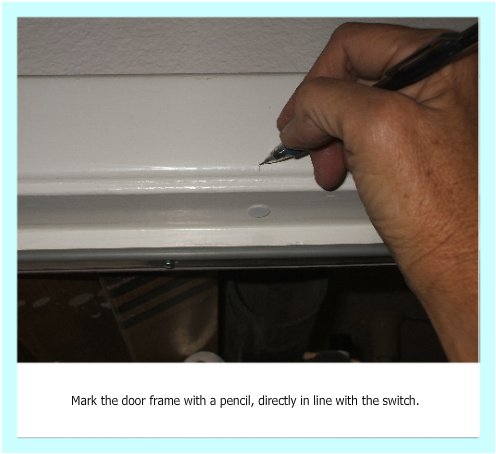
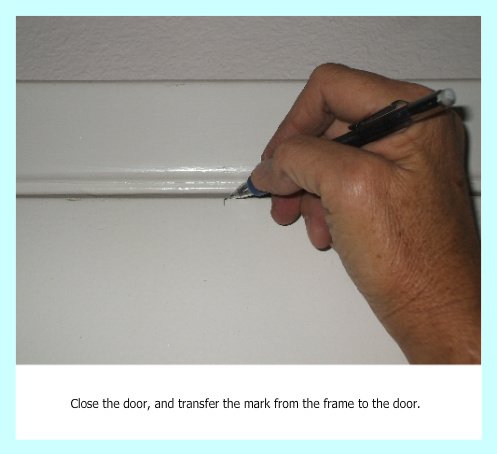
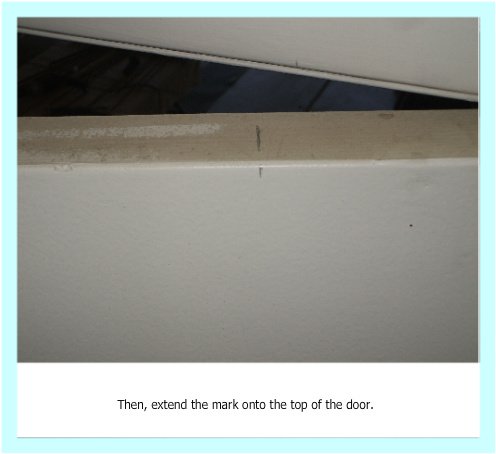
Make a small pencil line on the door trim, directly in line with the
magnetic door sensor. Close the door, and transfer the line onto the
face of the door. Use this as a reference to drill a 3/8" hole for the
magnet.
If the switch was drilled along the centerline of the doorframe, do the same for the door. If the switch is offset toward the inside or the outside of the house, offset the magnet the same direction.
The alignment of switch and magnet doesn't have to be perfect,
within about a 1/4" or so is fine. If you go beyond this, you may have a
door that sets up at arming time, only to cause a false alarm later.
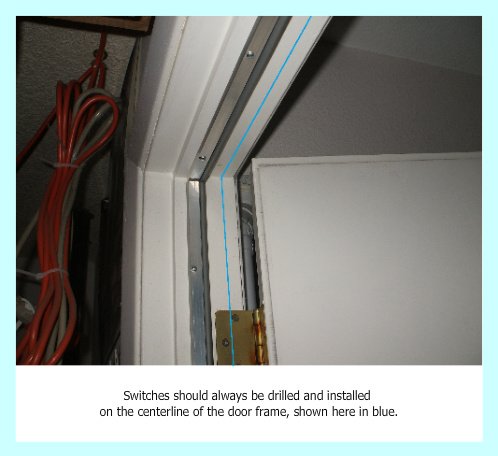
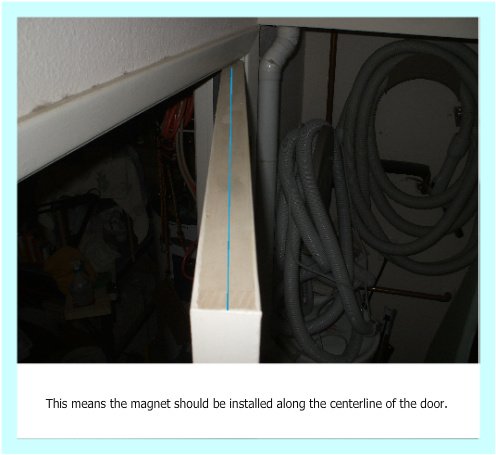
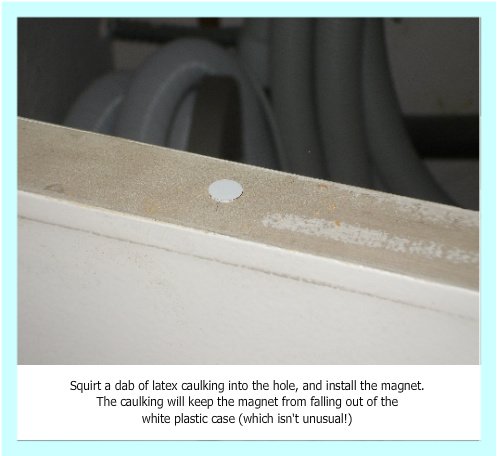
Just as with the switch, use a dab of caulking in the hole before
inserting the magnet. While it's not likely that the magnet will fall up
out of the hole, magnets often come loose from their plastic casing.
They can then fall deeper into the hole, often to the point that they
don't trigger the switch.
Test for clearance by closing the door slowly, and watching for any collision between the switch and magnet. If they hit each other, one or both must be seated a bit deeper.
Start with the magnet, by tapping it gently with the handle of a
screwdriver. If necessary, tap it in until it's flush with the door
surface. This will often cause the plastic flange of the case to break
off. This causes no harm, since the caulking will stop the magnet from
falling too far down. (You did use caulking, didn't you?!). Check clearance again, and if needed, tap the switch to seat it flush.
Testing Magnetic Switches
After the system is complete, check all openings for alignment. The easy way to do this is with the "Chime" feature, found on most alarm systems. This will give an audible tone or chirp when any perimeter door or window is opened. Some panels, like the DSC brand, also sound when closed.
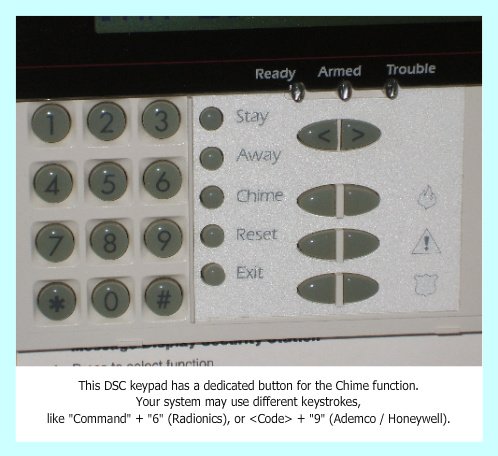
To use the feature, first enable it at one of the keypads. Then close all the openings in the house until the keypad shows a green light, or "Ready" condition.
Pick a door to start with, and open and close it several times. You should hear a beep for each opening. Next, close the door so it latches. Try to pull or push the door open against the latch. If you don't get a beep, the magnetic door switch and magnet are in good alignment.
If the keypad sounds off while the door is still closed, the two
are not lined up well enough. Check the positions of the switch and
magnet, and re-drill the magnet to more closely line up with the switch.
Caulk the magnet in place, and retest the alignment.
Caution:
If you have a door that doesn't latch securely, or has more than 1/2" of movement when the latch is engaged, then proper switch alignment isn't possible.
Repair or replace whatever latching hardware is necessary.
Until it's fixed, don't connect that particular door to the system. A door that doesn't close securely will only cause you headaches, in the form of false alarms!
Re-drilling and moving the magnet should put it in good alignment with the switch.
For magnets located in the top of the door, the double-drilling scars won't be visible. If you have to re-drill a magnet in the side of a door, be careful not to remove any more wood than necessary to get the job done. Then, use caulking or wood filler to repair the damage.
For tips on how to prewire for door switches, see Burglar Alarm Wiring for Securing Doors.
Find recessed switches at Amazon.com.
Get help installing surface-mount switches.
Return to Home-Security-Systems-Answers from Installing Magnetic Door Switches, Recessed Type
Return to DIY Home Security Systems from Installing Magnetic Door Switches, Recessed Type
Note: Feel free to print any of the articles on this site for personal, non-commercial use. Just look for this button:
If you found this website especially helpful, you might want to consider making a small donation. Since 2011, AzAlarmGuy has been providing free help and advice on home security systems to all of those in need.
Your gift, in any amount, will help me keep this website a free resource for anyone needing help with alarm system issues or questions.
Disclosure
I receive affiliate commissions from some of the companies and products I discuss. These commissions don't change the price that you pay.
Rest assured that this compensation does not influence my recommendations. I only endorse products and services that I truly believe to be an honest value for you, as a visitor to my site.
For more details, see my full disclaimer.


